How to schedule Report Condition?

Effortlessly schedule health report status reminders for patients through the Schedule Management feature located in the Patient Profile’s Schedule Section. Here’s a step-by-step guide.

Access Schedule Management

Navigate to Report Condition within the Patient Profile’s Schedule Section.

Edit Report Condition

Click on the pen icon at the upper right side to access the editing options.

Configure Reminder Details

Set vital details like Start Date, Duration, End Date, Recurrence, Frequency, and Timing.

Save Changes

Once you’ve configured the details, click “Save” to confirm the changes.

Tips:

When utilising ConnectedLife’s scheduling features, it’s crucial to adhere to Futuristic Scheduling. Ensure selected dates for scheduling are in the future to prevent any system restrictions on scheduling for past dates. This ensures smooth and effective utilisation of the scheduling features.

What are the features that can be Scheduled for user(s) in Schedule Management?

In the ConnectedLife dashboard, you can schedule various reminders for your patients, Enhancing their engagement and adherence to health routines.

You can Schedule following from the Schedule Management:

  • Report Condition
  • Medication and Specialised Nutrition
  • Stay Hydrated
  • Activity
  • Take a Rest

Schedule Management

Under Schedule Management which can be found in the Patient Profile’s Schedule Section, you can edit these sections by simply clicking on the pen icon at the upper right side.

Report Condition

Schedule reminders to prompt patients to complete their health report status. You have to set the Start Date, Duration, End Date, Recurrence, Frequency, and Timing. After filling out the data, click Save.

Medication and Specialised Nutrition

Set reminders for patients to take their medication or follow a specialised nutrition plan. You have to set the Start Date, Duration, End Date, Recurrence, Frequency, Timing, and Notes If there are any. After filling out the data, click Save.

You can also delete the medication from here.

Stay Hydrated

Create reminders to encourage patients to log their water intake regularly. You have to set the Target Volume, Start Date, Duration, End Date, Recurrence, Frequency, and Timing. After filling out the data, click Save.

Activity

Schedule reminders for patients to engage in physical exercises, promoting a healthy lifestyle. You have to set the Type of Exercise, Start Date, Duration, End Date, Recurrence, Frequency, and Timing. After filling out the data, click Update Schedule. You can also delete the schedule from here.

Take a Rest

Set reminders for patients to ensure they allocate time for proper rest and recovery. You have to set the Start Date, Duration, End Date, Recurrence, Frequency, and Timing. After filling out the data, click Save.

Tips:

The actions mentioned above can only be done by Support Team Members (W+). When utilizing the scheduling features in the ConnectedLife dashboard, it’s essential to keep in mind the Futuristic Scheduling. Ensure that the dates selected for scheduling the various features for patients are in the future. The system doesn’t allow scheduling for past dates.


What is Schedule page in the user dashboard?

In the ConnectedLife dashboard, you can schedule various reminders for your patients from schedule management, enhancing their engagement and adherence to health routines.

You can Schedule following from the Schedule Management:

  • Report Condition
  • Medication and Specialised Nutrition
  • Stay Hydrated
  • Activity
  • Take a Rest

Alerts and Nudges can be scheduled from Programme Management and the User’s Profile. Also, Scheduling Messages to the User can be scheduled from the User’s Profile and broadcast messages can be scheduled for bulk users.

Alerts and Nudges

For Multiple User:

Go to Program Management and Click Alerts/Nudges.

Click Add a New Alert/Nudge.

Also, you can choose Alerts/Nudges which one you want to set from the dropdown menu.

Search and select the Alerts and Nudge you want to set or search the existing Alert and Nudges Template from the search bar, if you want you can set a custom nudge also from the “Custom” option and click Next. Crosscheck the nudge rule, schedule time, and click Next.

Edit the communication channel (Email, Push notification and SMS) and messages then click “Next” or you can keep three channels as well.

Assign Users to Nudges by clicking the box before the user name and Click “Assign Alert/Nudges.”

For Single User:

From your Support Team account click on the user or search the user you want to schedule Alert/Nudges.

Choose the “Alert/Nudges” option from the patient’s profile and then click “+Add a New Alert/Nudge

The next steps are similar to the “Alerts/Nudges” to its creation.

Scheduling Message to the User

For Single User:

From your Support Team account, search your user or click on the user. You can select the existing message template by using the “Search Bar.” Otherwise, you may create your custom message by inputting text on the “Create Schedule Message” bar and then pressing the “Next” button. Now, Set the Scheduling Timeline and click the “Schedule” option.

Under the Overview or Analysis tab, locate the message button positioned at the top right of the screen.

Click on the “Scheduling” icon.

Set the Scheduling Timeline such as Start Date and End Date, Set Recurrence, set how many times a day (maximum 7) the message will be sent to the user, set timing, set if the user will receive the message via email/phone number, other than in-app message. Click “Next”.

After setting the timeline click the “Schedule” option. Your message has scheduled.

For Multiple User:

On the left side of each user, there is a box. Click on the box and you’ll be able to mark the user accordingly to broadcast a message. Then from the bottom click the “Speaker” button.

If you want you can “Schedule” the message from the schedule icon at the bottom.

Type the message or search the created template. And click Next.

Set the Scheduling Timeline such as Start Date and End Date, Set Recurrence, set how many times a day (maximum 7) the message will be sent to the user, and set timing.

Set if the user will receive the message via email/phone number, other than in-app message. Click “Next

Click on the Schedule.

Tips:

The actions mentioned above can only be done by Support Team Members. When utilizing the scheduling features in the ConnectedLife dashboard, it’s essential to keep in mind the Futuristic Scheduling. Ensure that the dates selected for scheduling the various features for patients are in the future. The system doesn’t allow scheduling for past dates.

What is the Analytics page in the user dashboard?

Analytics pages in the user profile help you to understand the user’s historical data by selecting the data range up to 90 days. Support Team Member (W+) is also known as STM. You can utilise this feature from your Support Team Member (W+) account only.

To check the Analytic page in the user dashboard, Please follow the below steps:

Login to the STM → Search the user using the search bar → Click on the user → Click Analytics

Below the Analytics page, you will see the calendar option to select the data range up to the last 90 days. You can customise the date also from the “Custom range” option.

You can check the steps data from the Analytics section like how many steps users have completed against the target. It will be collected from smartwatches. Same way breathing rate will be recorded and will be shown beside the steps.

In the Wellbeing and Anxiety section, based on user’s report health status submission from the app, you can check users wellbeing and Anxiety.

Depression data will also be shown based on the report health submission of the user from the app. The Floors section will show you the floor climbed data of the users. This data will be synchronised from the app.

In the exercise section of Analytics, you can check the exercise data of the users against the target. In the Distance section, you can see the distance you have covered in a day or selected particular days. Besides distance data, it will also show the average distance data as well as minimum and maximum distance data of the user.

User data export as .XLSX/API

This article will help you to understand how to export user data using your account as a Support Team Member (W+).

dashboard. You will be able to export data in two formats.

  1. Export as .XSLX

First, log in to your Support Team Member (W+) account. Then search the user by using the User Name/ID. Then click on the user.

You will see a download Icon on the top right corner of the dashboard. Click on it.

Once you click on the download icon there will be a drop down, Choose Export as .XSLX

Now you can select specific data from there to be exported. Or if you want to export all the data, it’s also possible. Once you select the data, please click on the “Download” Icon.

Now choose the folder of your device where you want to save the file. Now it’s done. This is how you can download user’s data as. XLSX format.

  1. Export API

To export API once you log in to the Support Team Member (W+) account, search the user from the search bar, Now click on the user. In the same way you will see the download Icon on the top right corner of the dashboard. Click on it. Now choose the “Export API” option.

Now you will be redirected to an API Site. Click on the indicated drop-down on the right corner of the dashboard.

Now choose the option “Try It Out”.

Now please input the required API key here. Once you copy and paste the API key in the API key field, then click the “Execute” option from below.

Once you execute data, now you will be able to see the data by scrolling down to the page.

How to customise parameters from user dashboard?

What is Parameter?

Parameters typically refer to various metrics or indicators related to an individual’s well-being. These parameters might include things like heart rate, blood pressure, sleep patterns, exercise levels, water intake, and other relevant data points that help Care Team or Support Team Member monitor and manage the user’s health and wellness.

Parameters Customisation

Once you’ve navigated to the user profile, gently tap on the “Parameters” button. Here, you’re free to personalize individual items to your liking with a simple touch. Whether you opt for a comprehensive adjustment with a single tap on “All” or delicately select specific items, the choice is yours to make.

You may customise parameters in the same way by tapping into analysis.

Tips:

Parameters customisation can be done only by Primary Support Team Member.

How can I contact with the user(s)?

Support Team Members can contact the users in various ways. Additionally, organisation administrators can send broadcast messages to individual individuals or in bulk. This article outlines the step-by-step process for Support Team Member (W+), to ensure a smooth login experience.

You can effortlessly contact your patient using the “Message” icon from the dashboard. There are four different message patterns to send to the users from your support team account.

Process 1: Send Private Message to the User

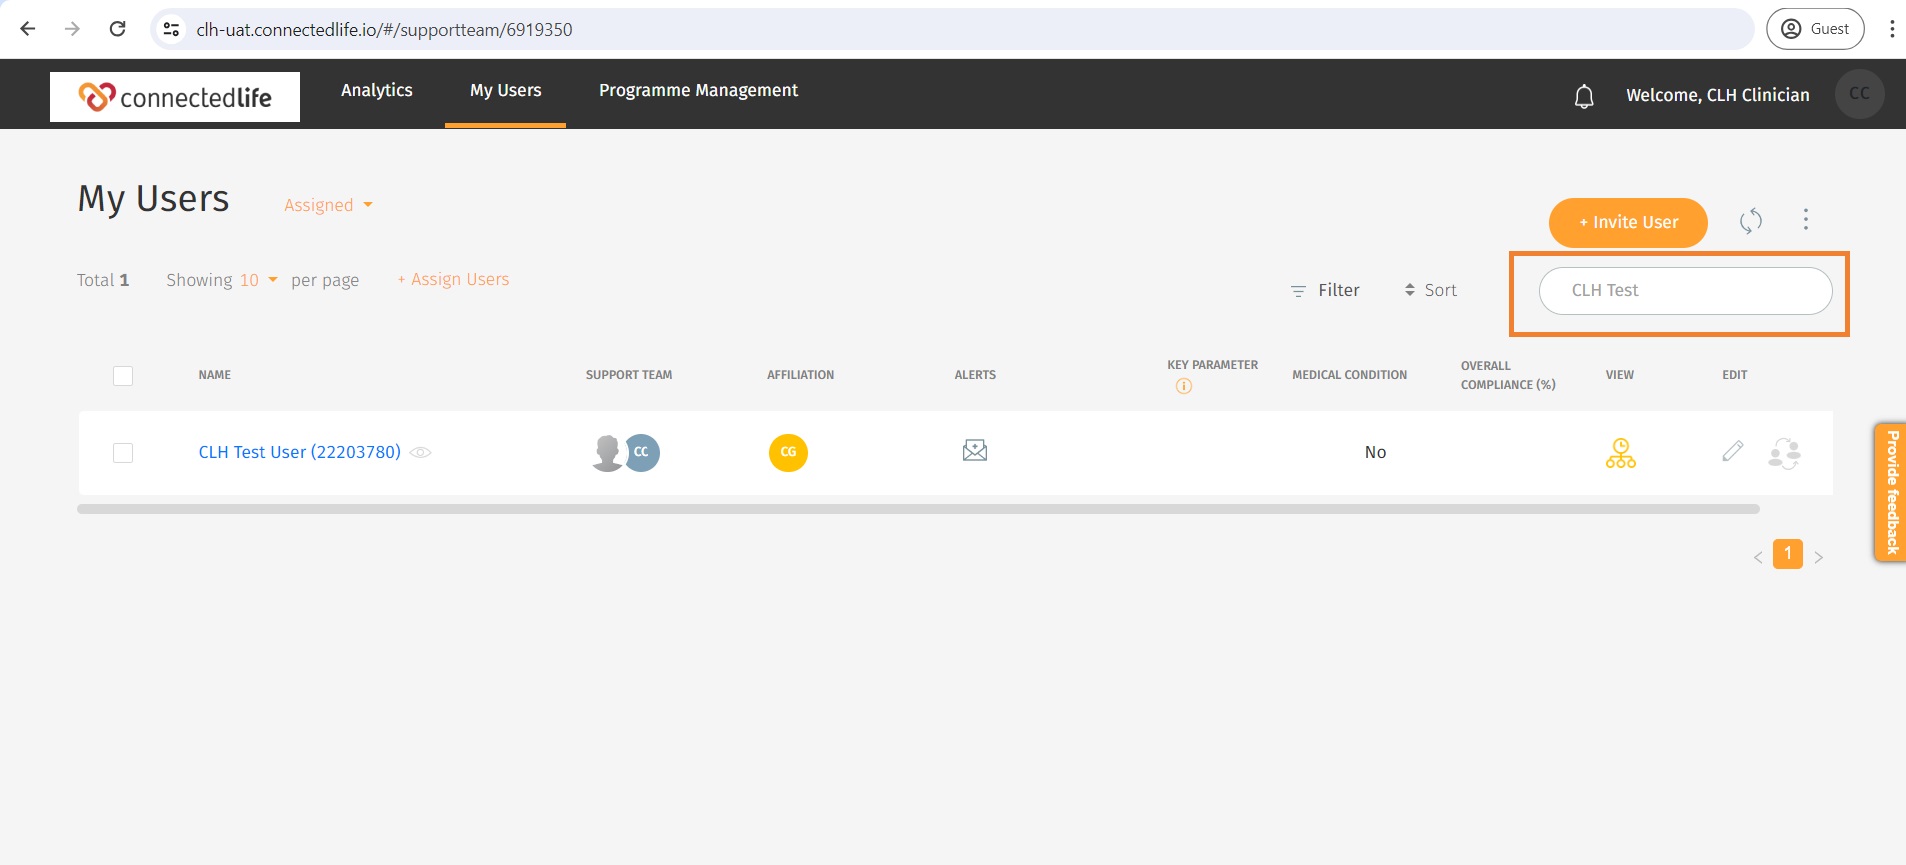
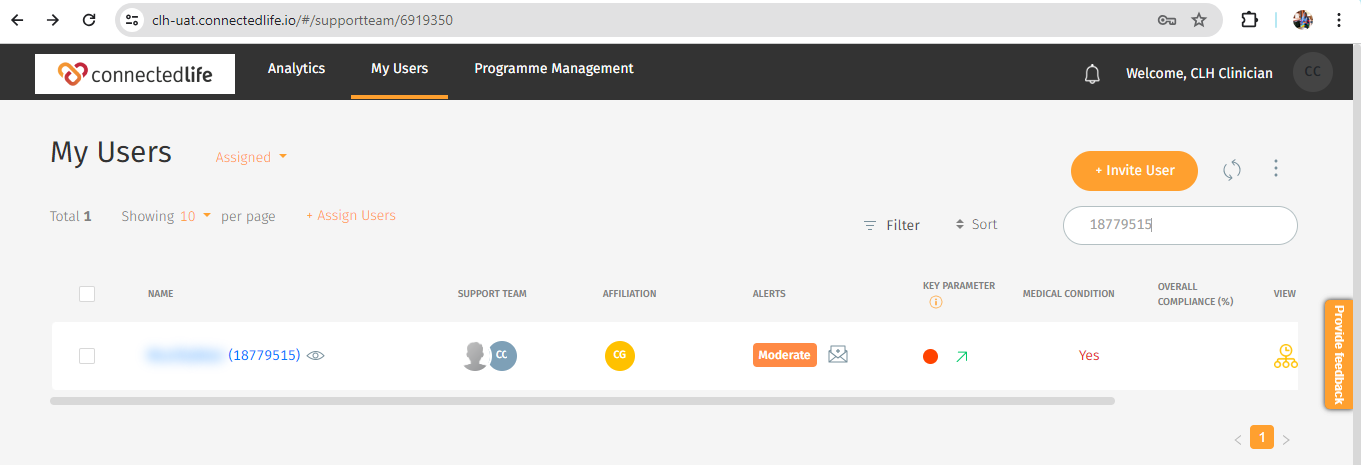
Step 1: Log in to the Dashboard and Search for the Patient

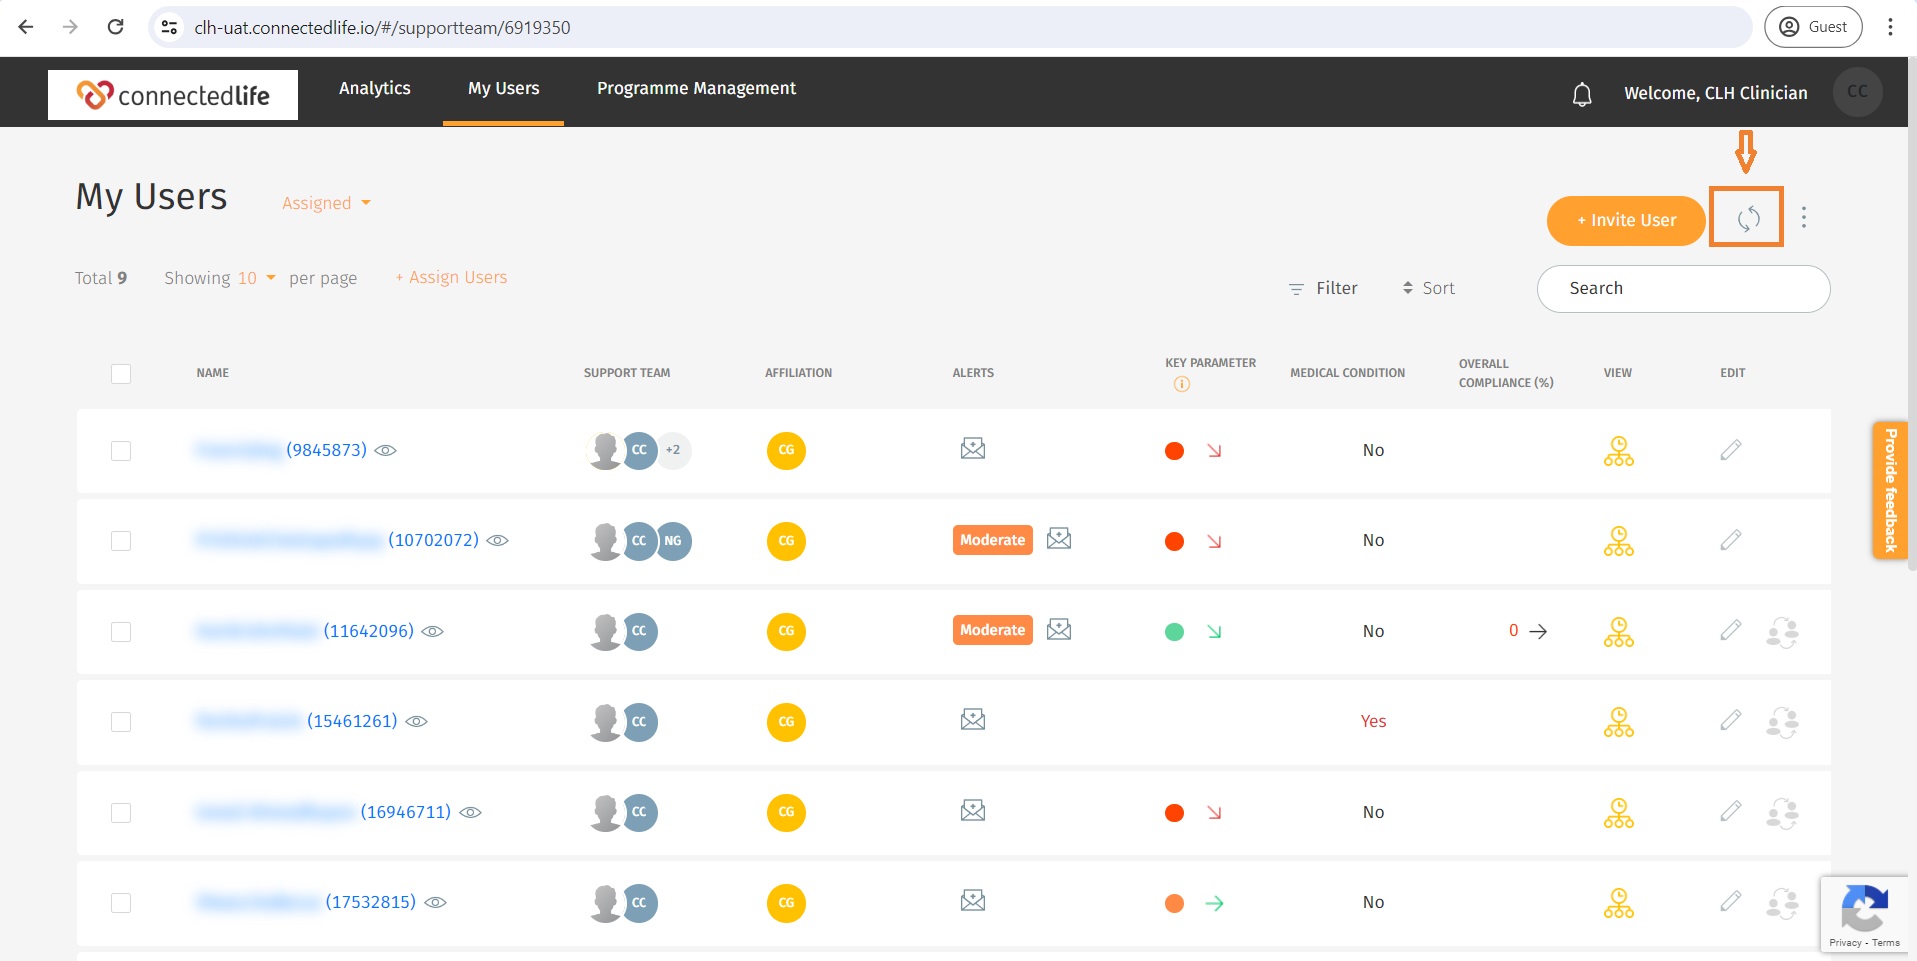
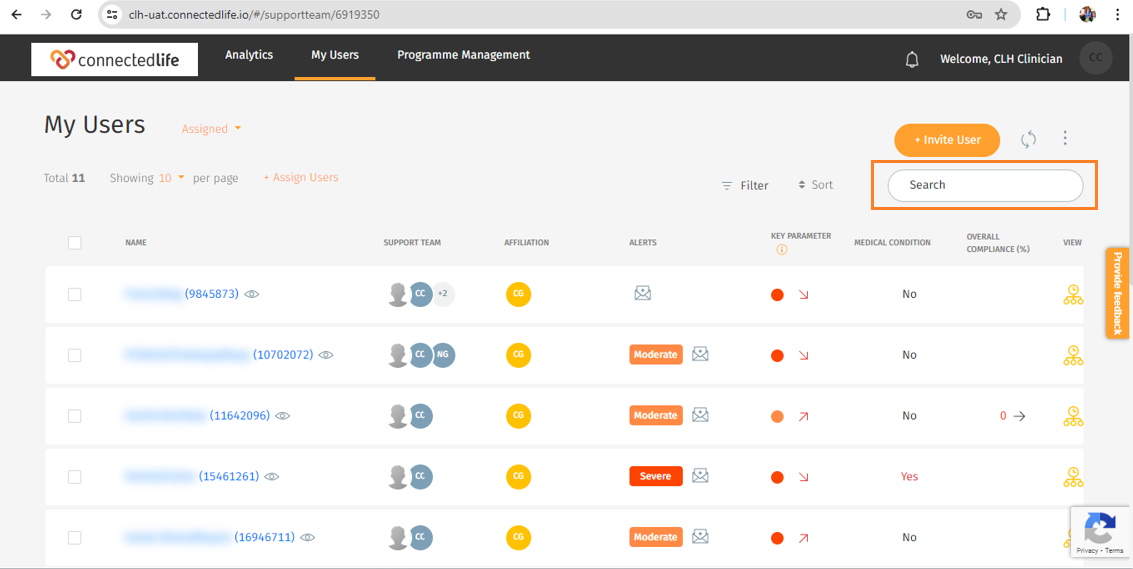
Begin by logging in to the ConnectedLife dashboard, use the search function on the top right corner to find the specific patient you wish to contact and utilse the User ID to search properly.

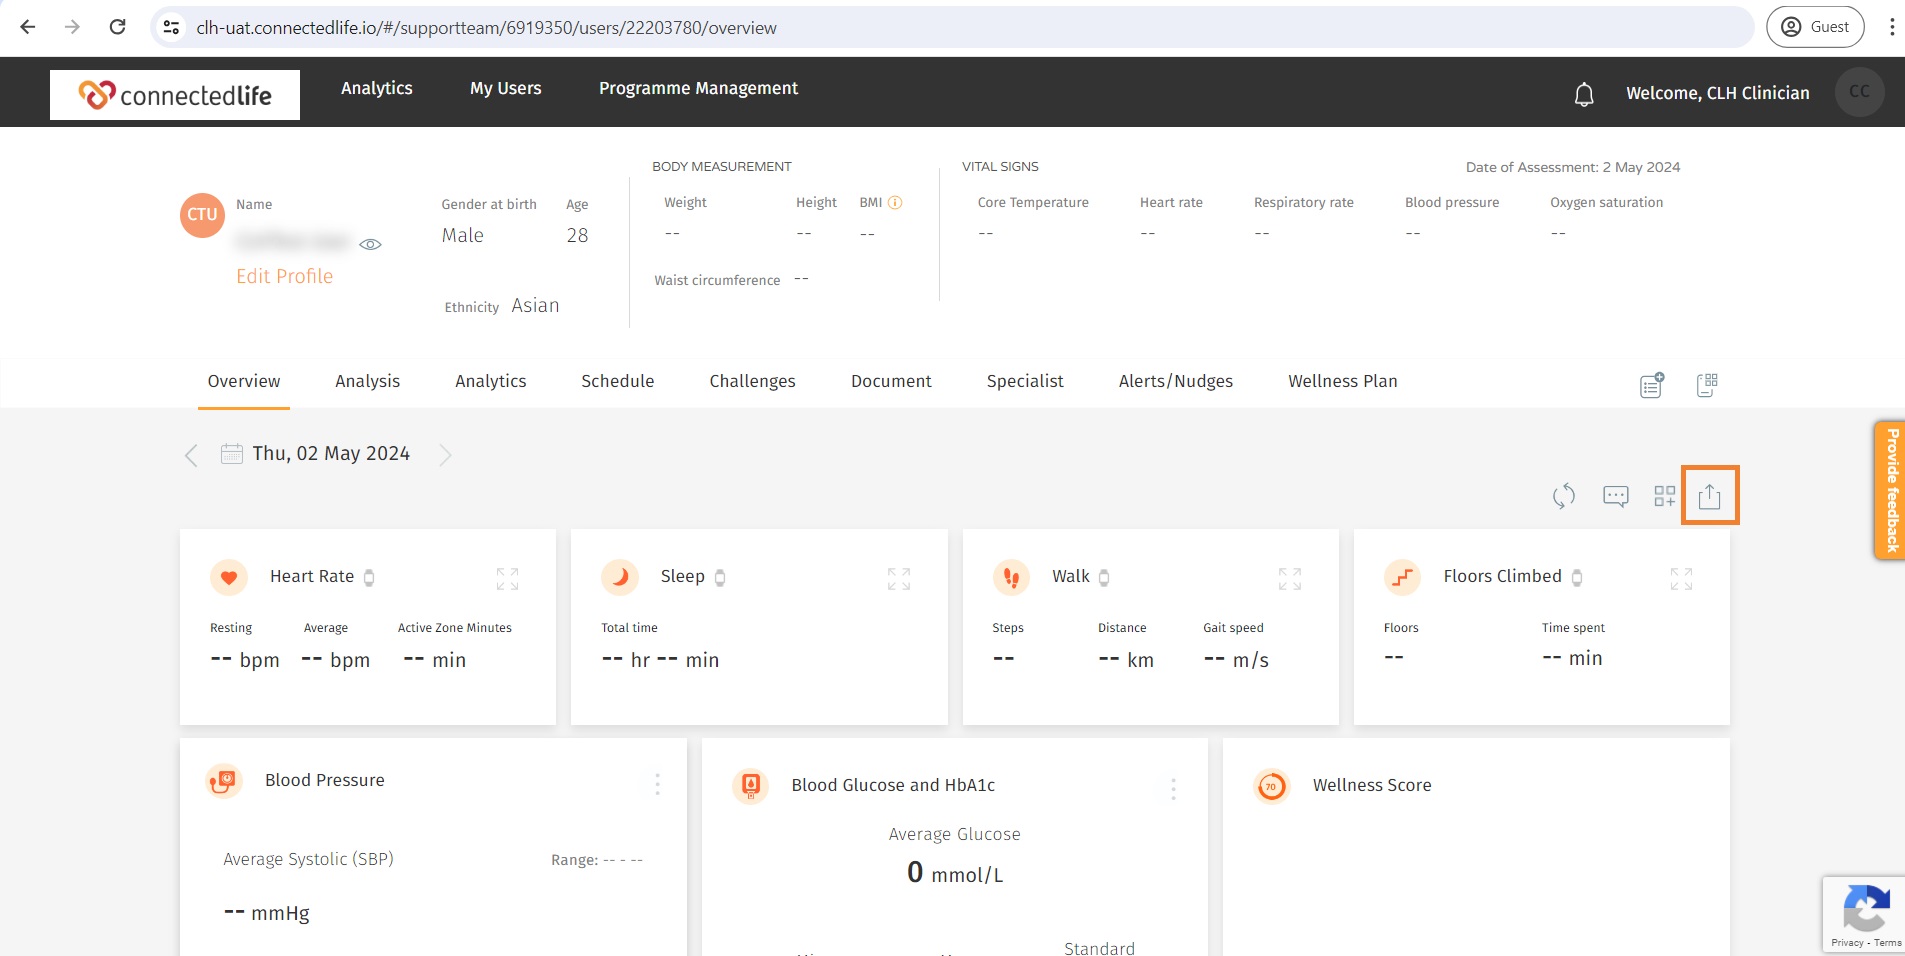
Step 2: Access the Messaging Option

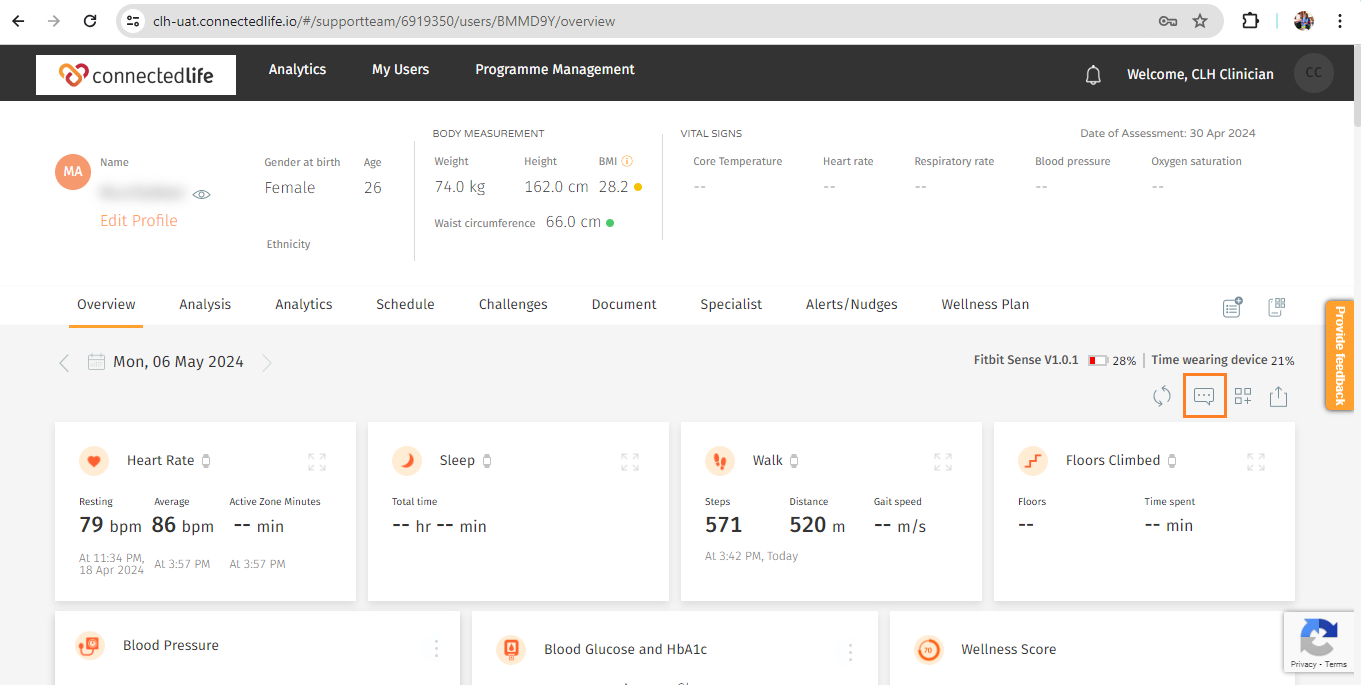
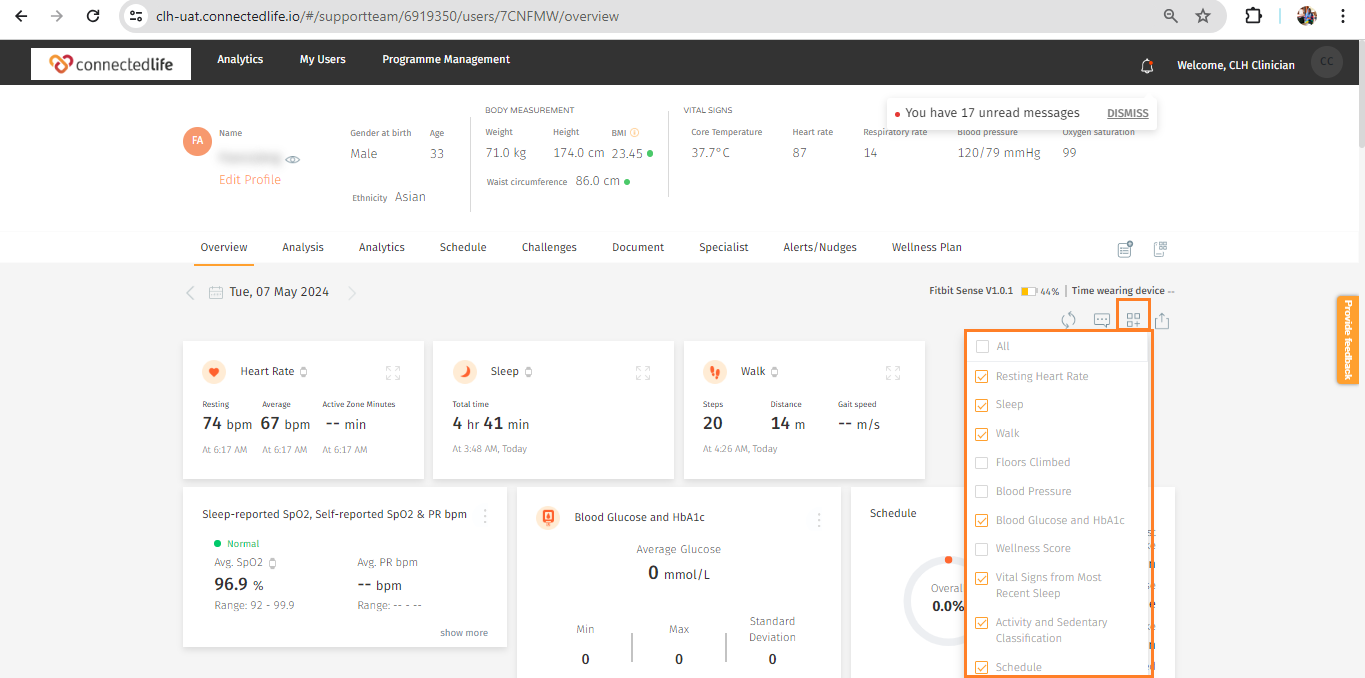
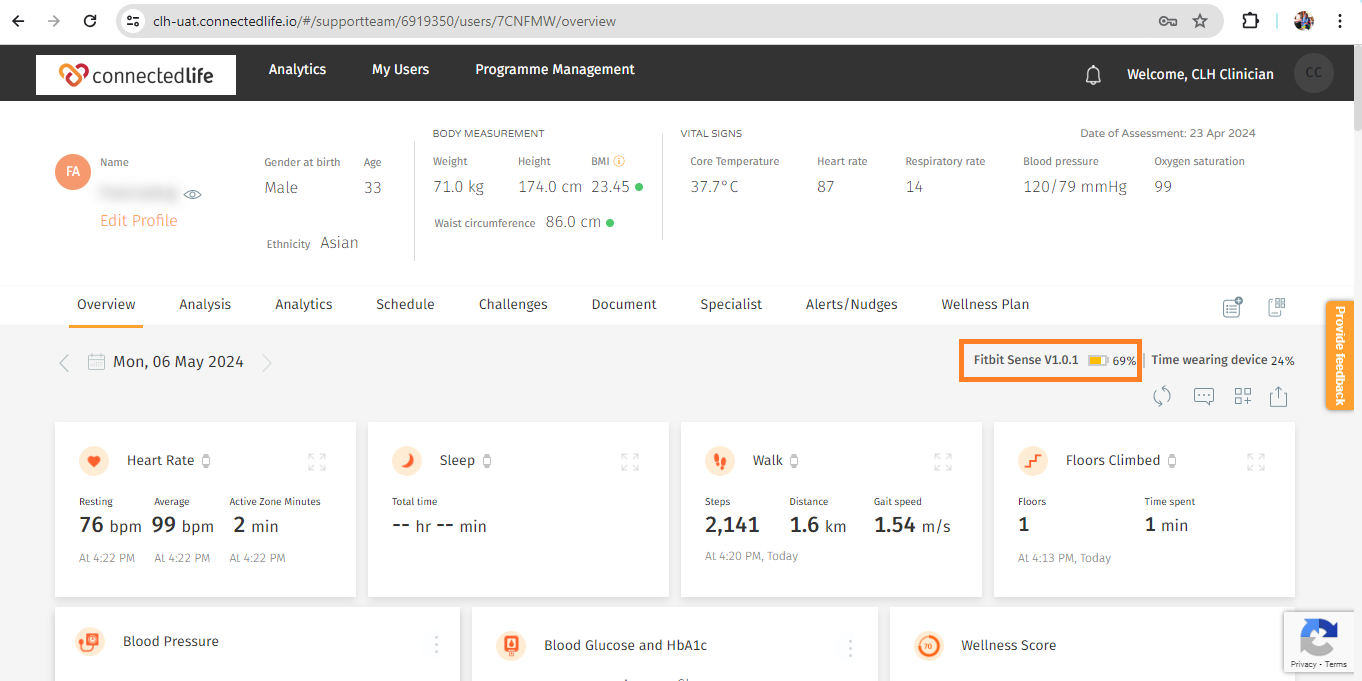
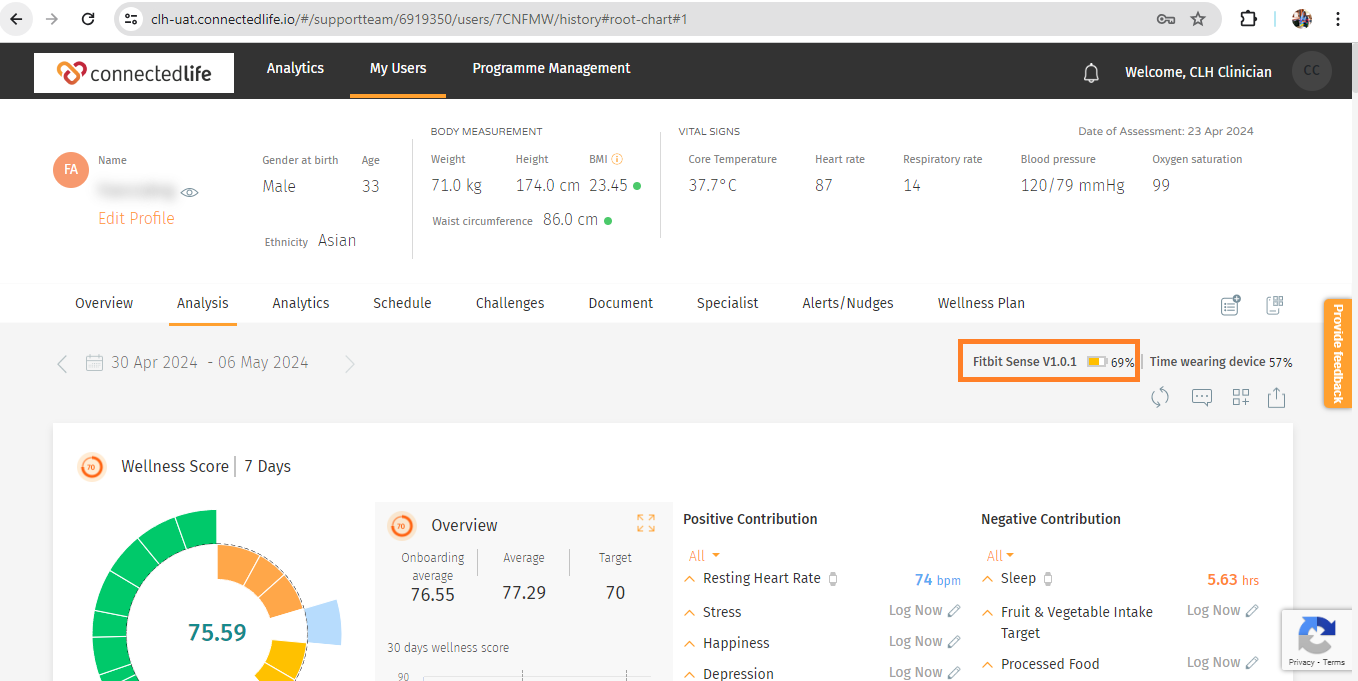
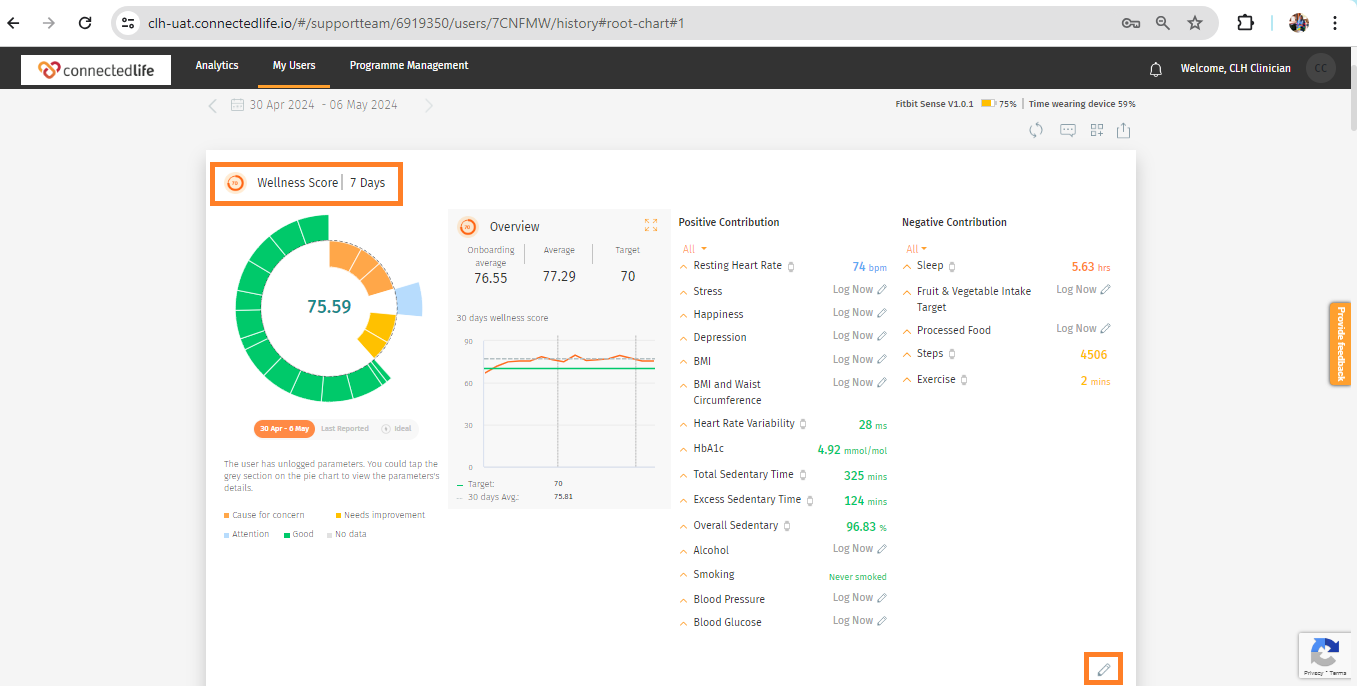
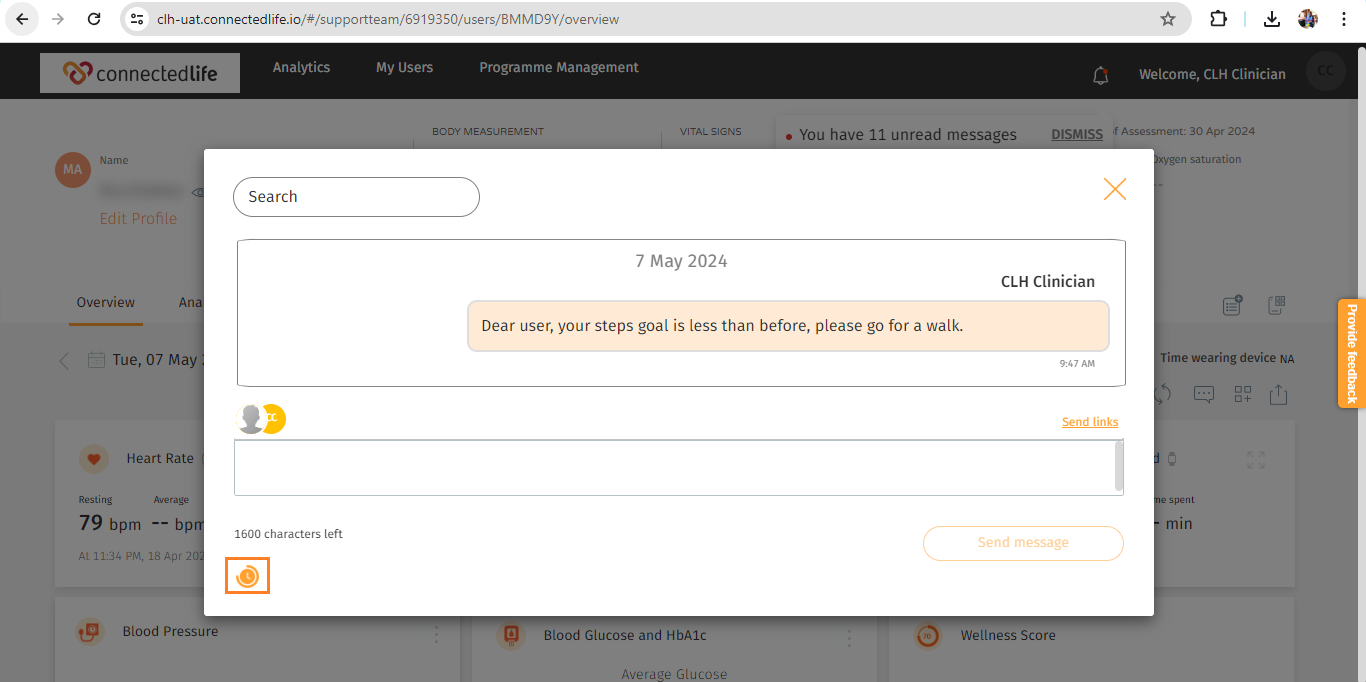
Under the Overview or Analysis tab, locate the message button at the screen’s top right.

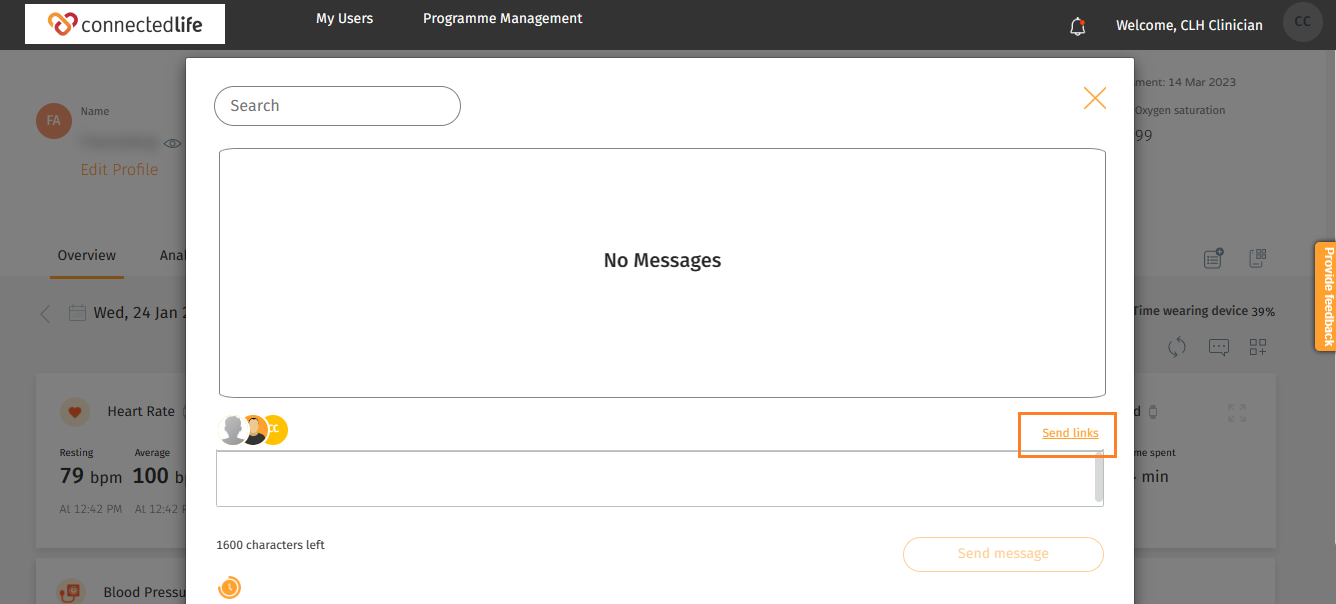
Step 3: Compose and Send the Message or Link

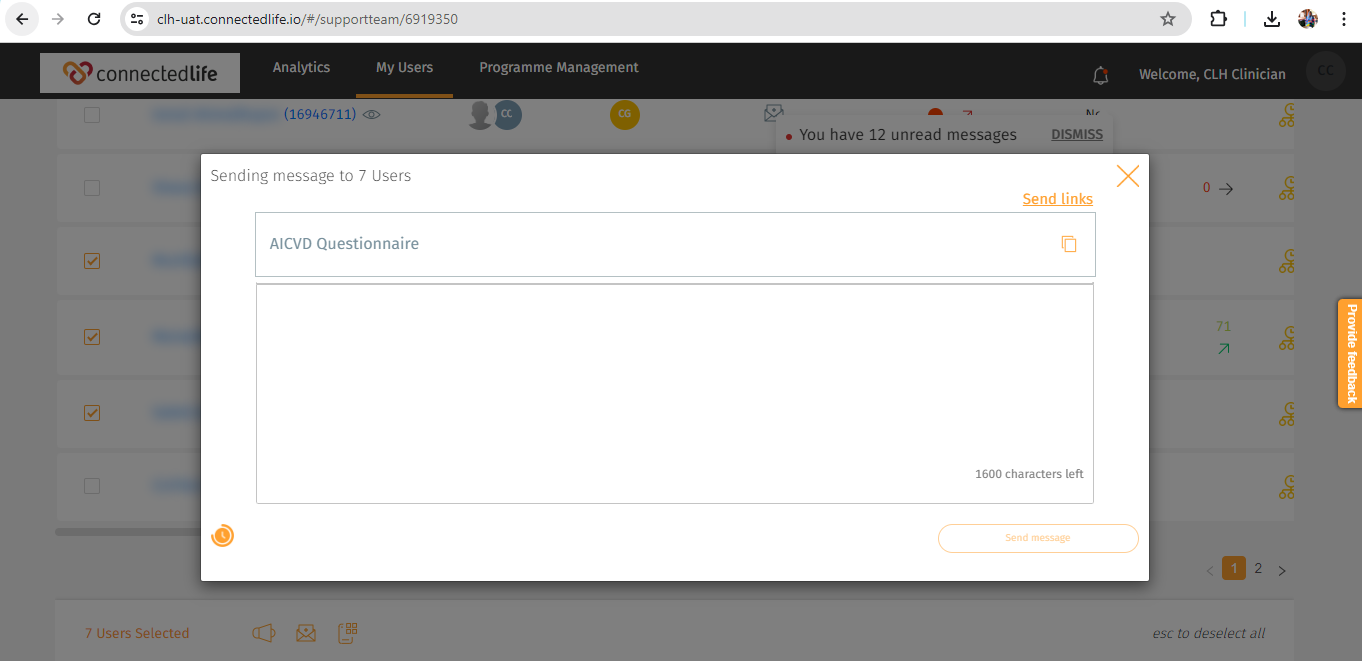
Type your message in the provided space and click “Send” to dispatch the message to your patient.

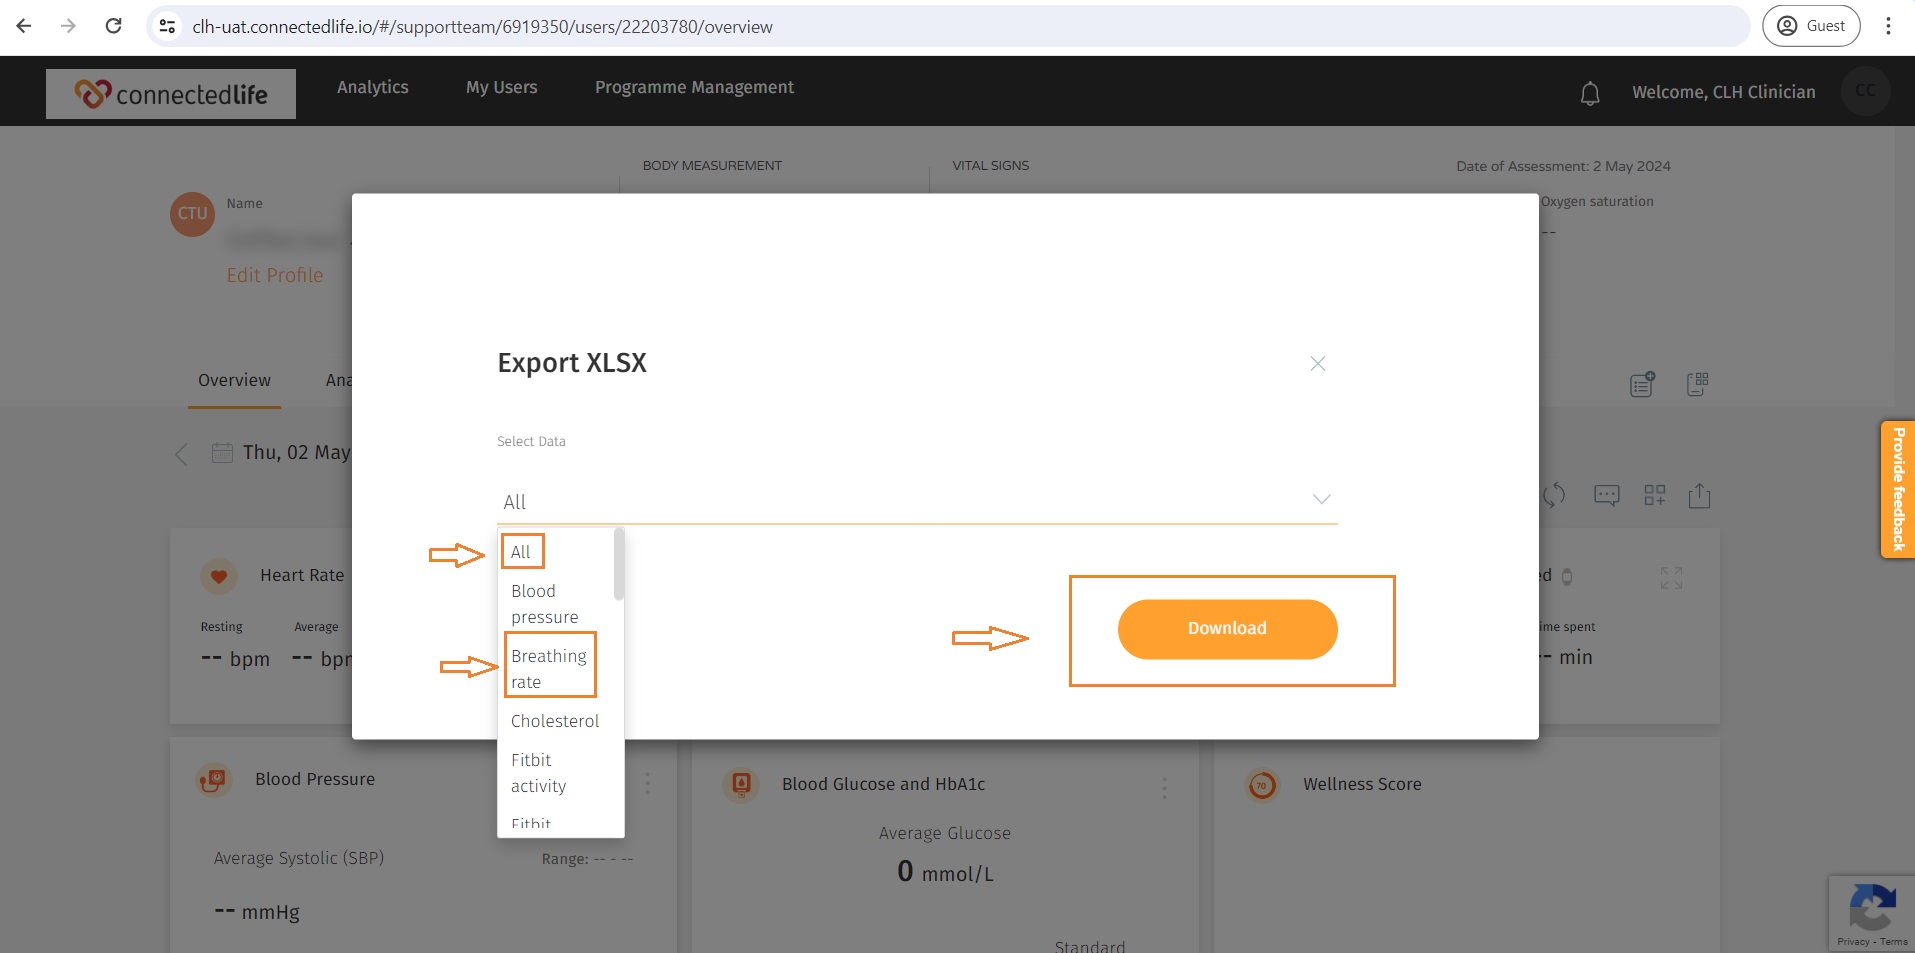
You can also send links to the patients, to initiate the process, simply click on Send Links.

.

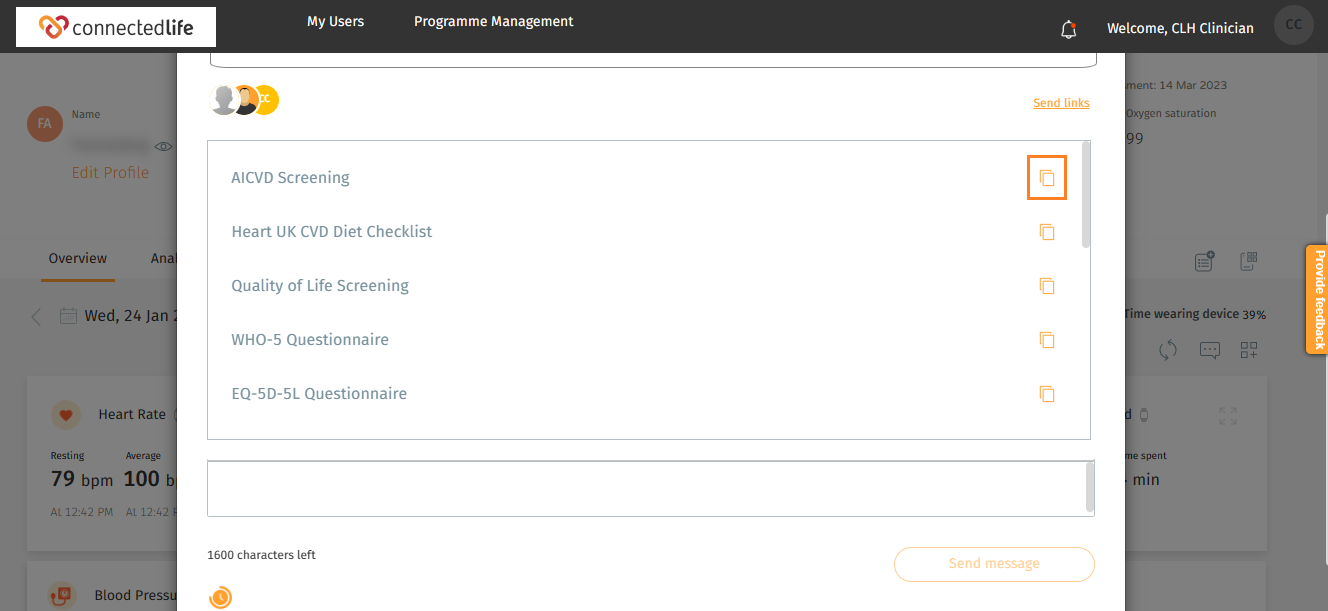
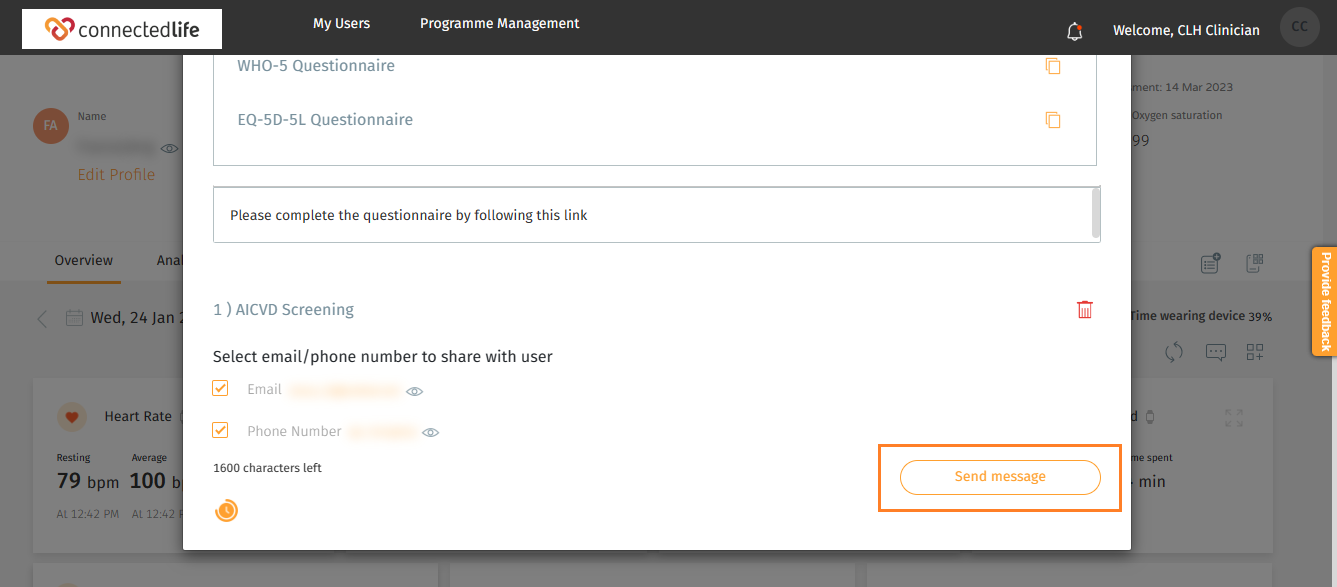
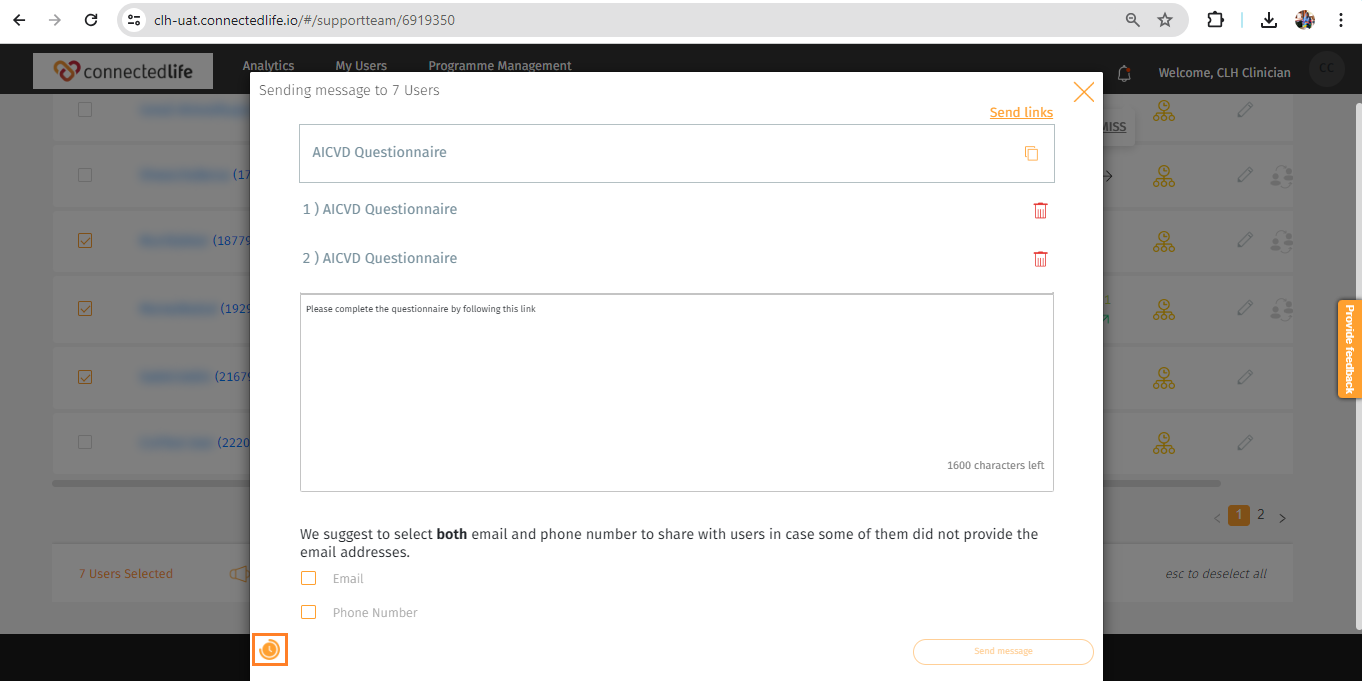
After clicking Send Links, you will see a list of links. Then select which one will be sent to your patient by clicking the box icon beside the link’s name.

You can delete the link you have selected to send by clicking the delete option.

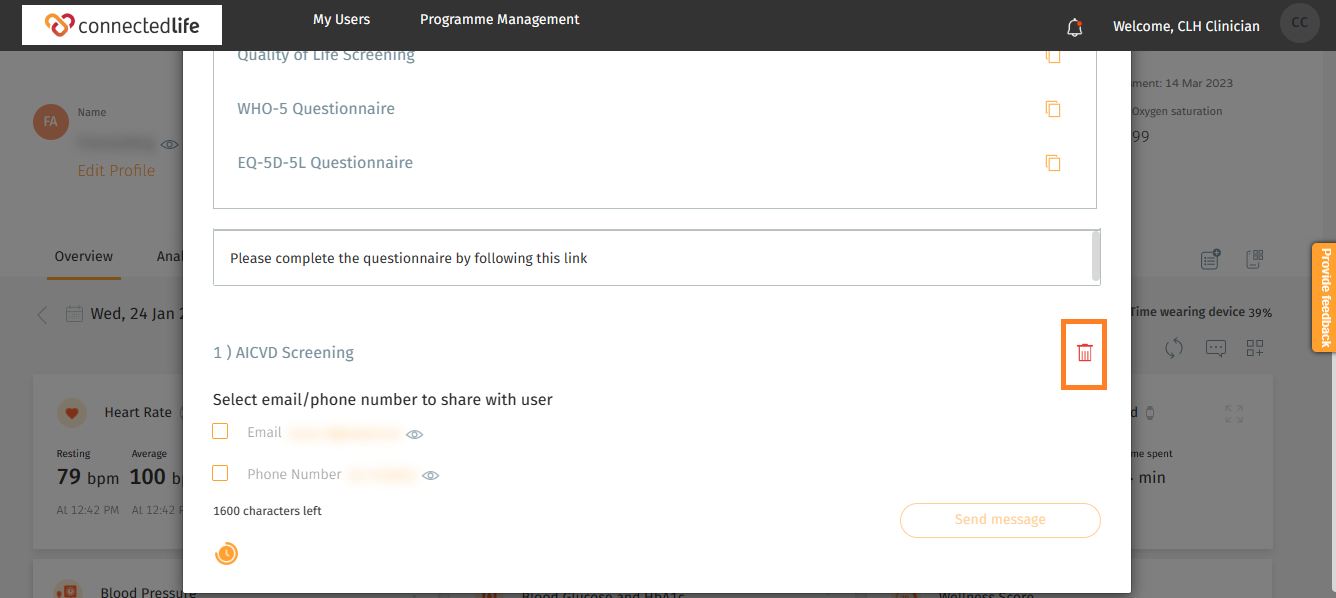
Now select the mode of sharing (Email or phone number) and then send the message to the patient.

Step 4: The Patient Receives the Message or Link

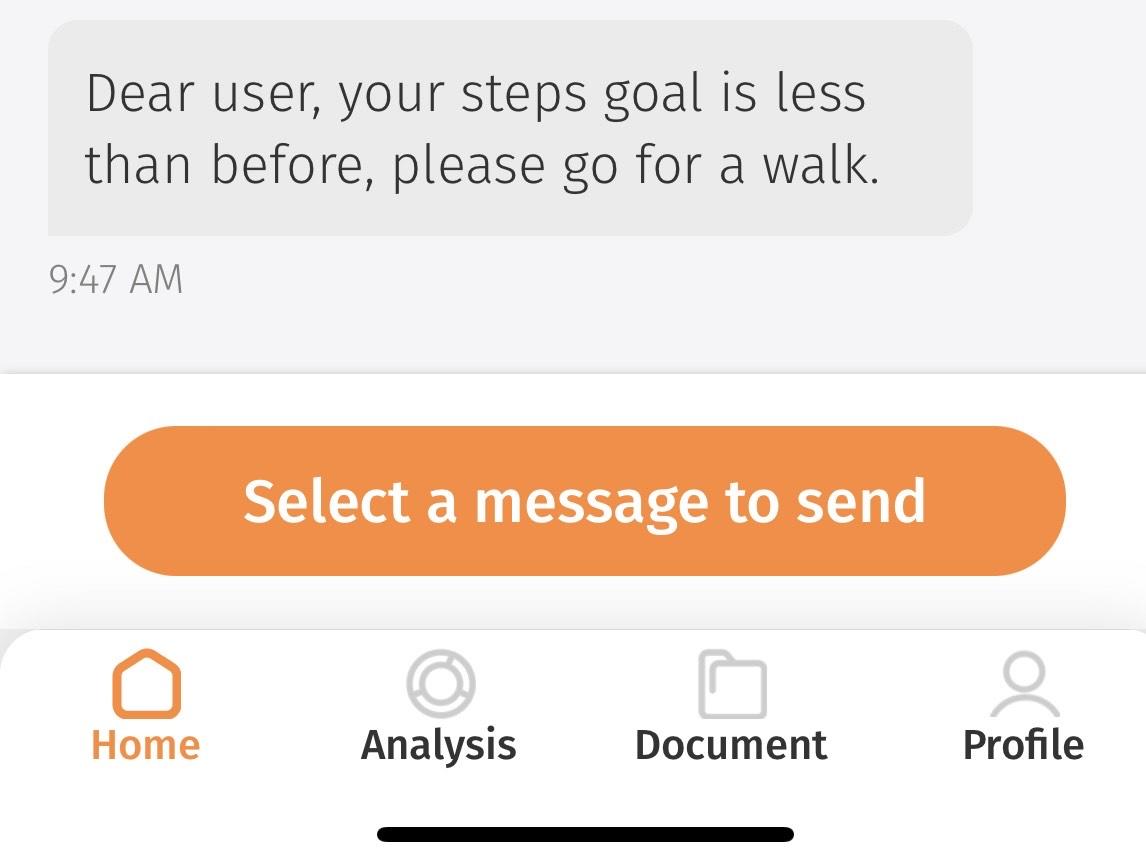
The patient will promptly receive the message on their mobile app.

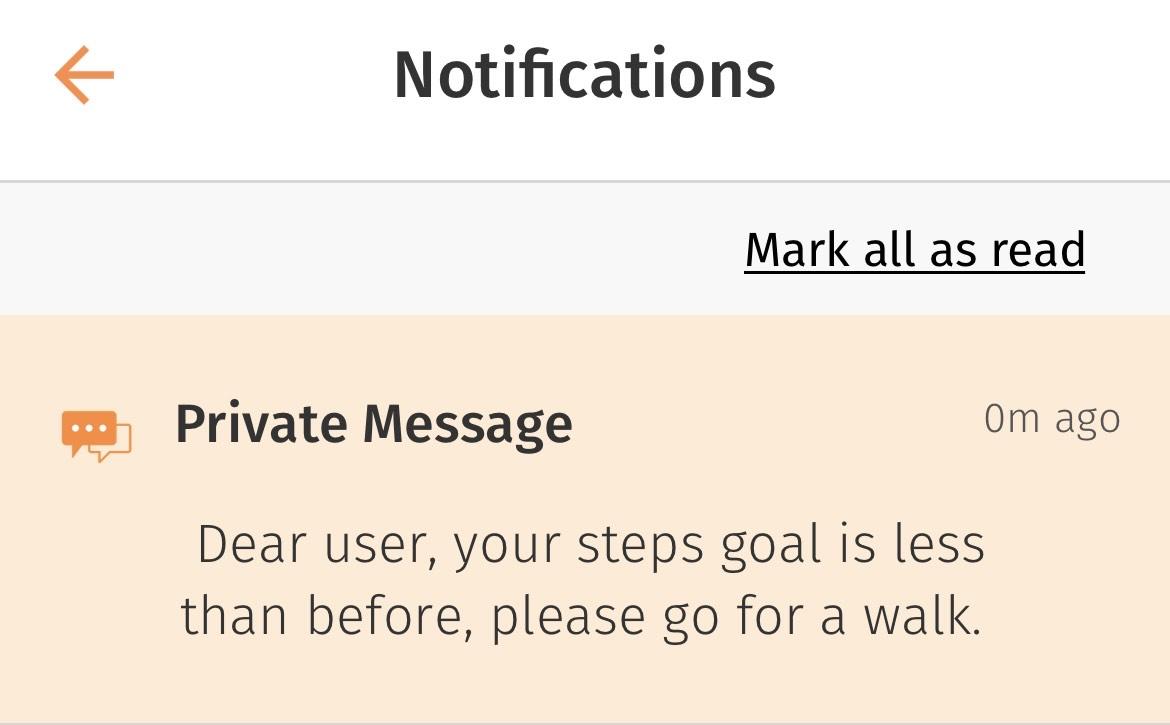
The patient will promptly receive the link’s notification on their mobile app. Check your email/SMS for the link’s URL.

Process 2: Scheduling Message to the User

Step 1: Access the Messaging Option

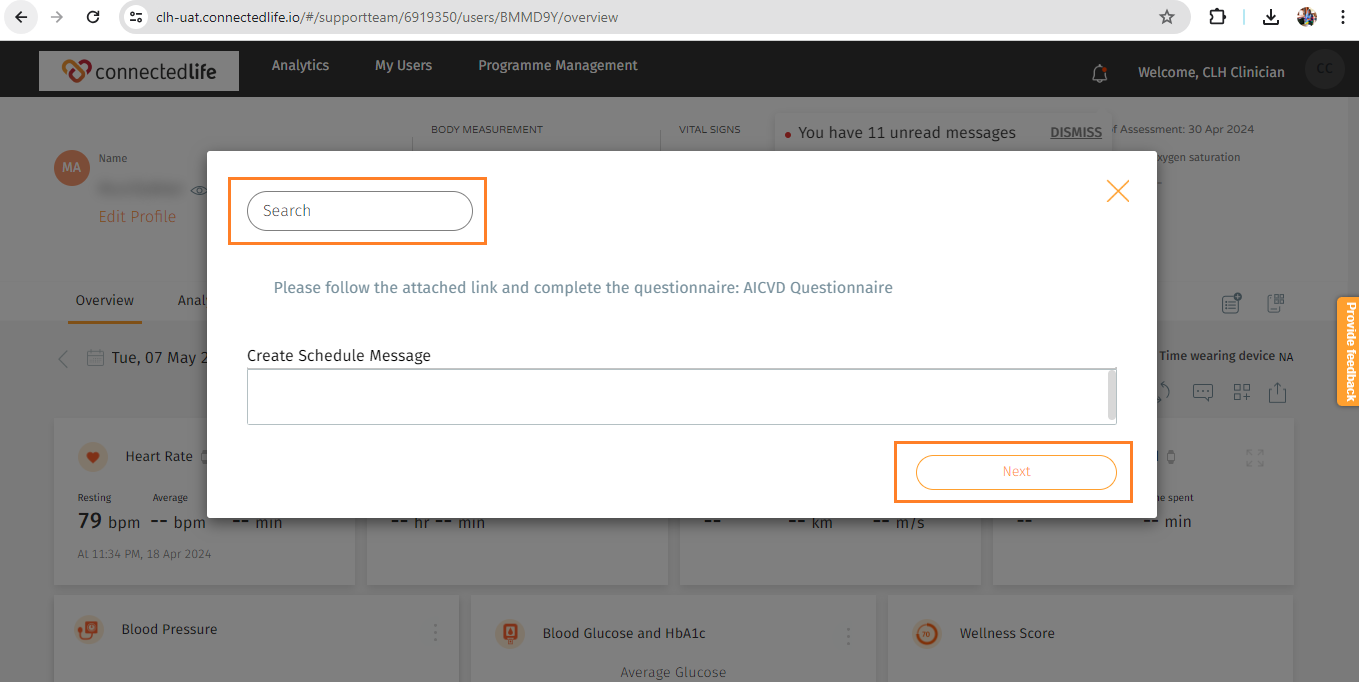
Click on the “Scheduling” icon and a popup containing a pre-created scheduled message template for you to choose from.

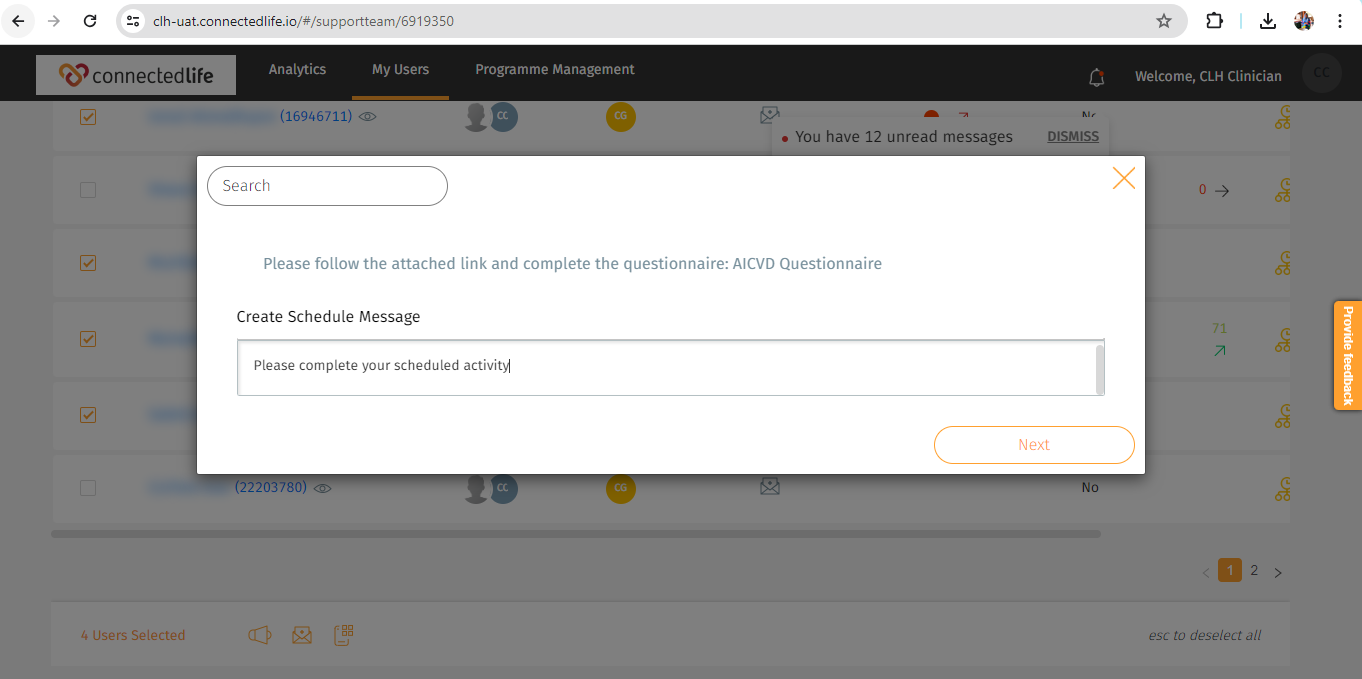
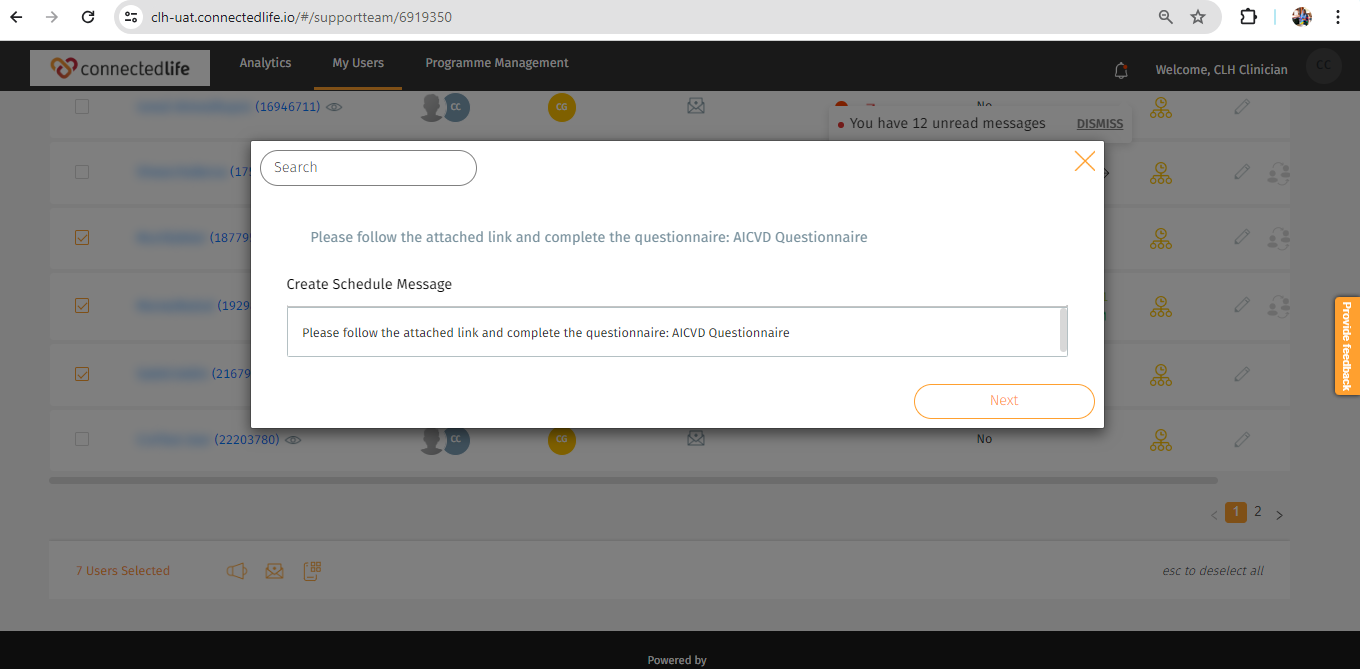
Step 2: Use the “Search bar” or “Create Schedule Message” option

You can select the existing message template by using the “Search Bar” Otherwise You may create your custom message by inputting text on the “Create Schedule Message” bar and then pressing the “Next” button.

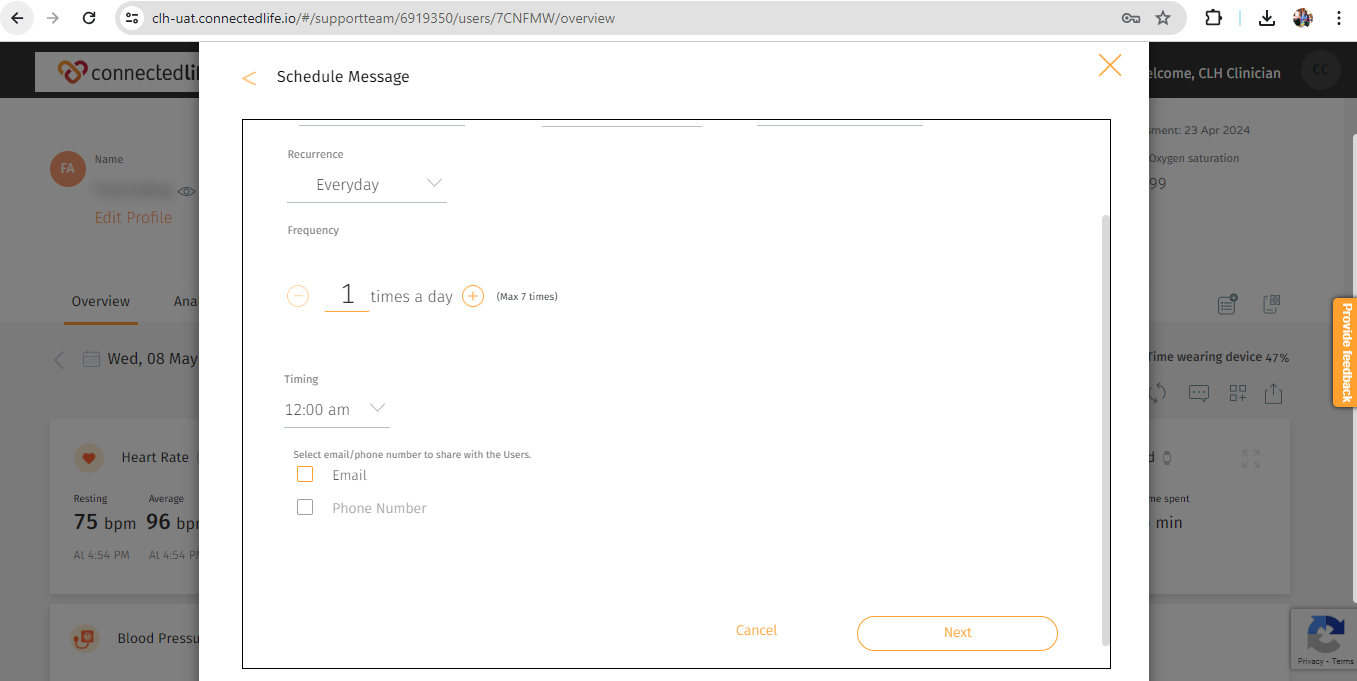
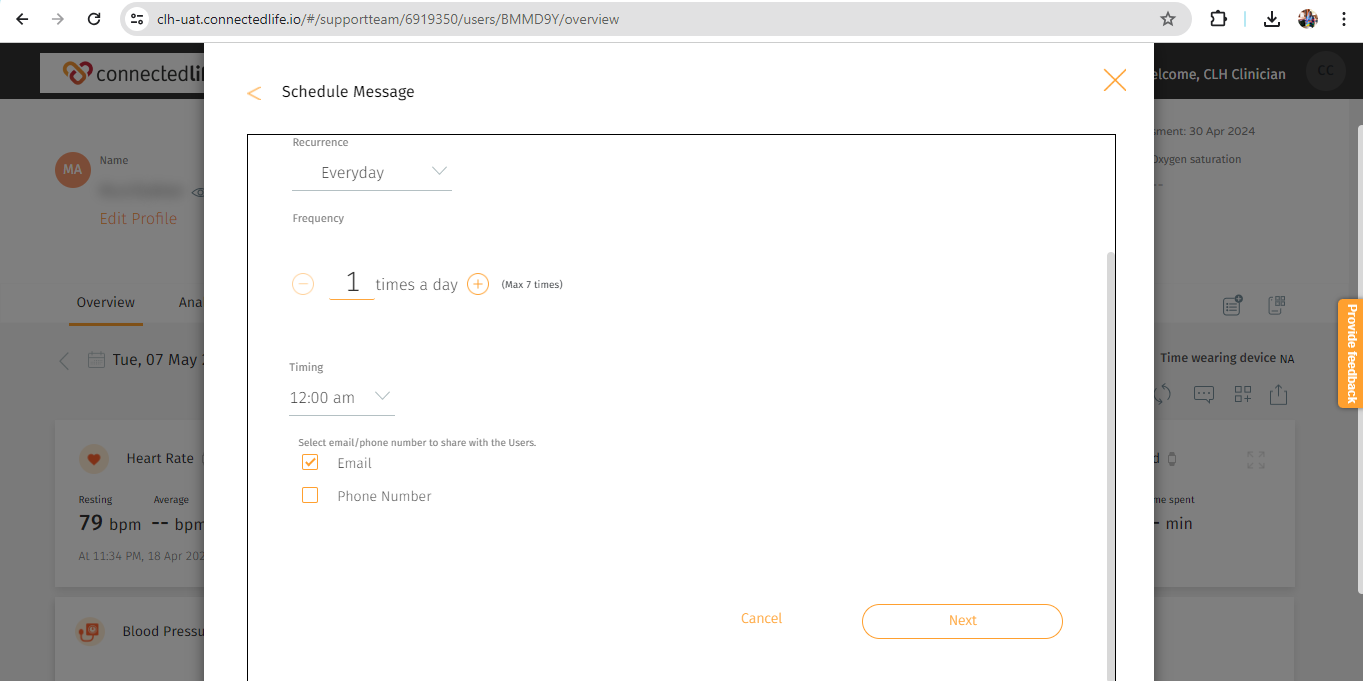
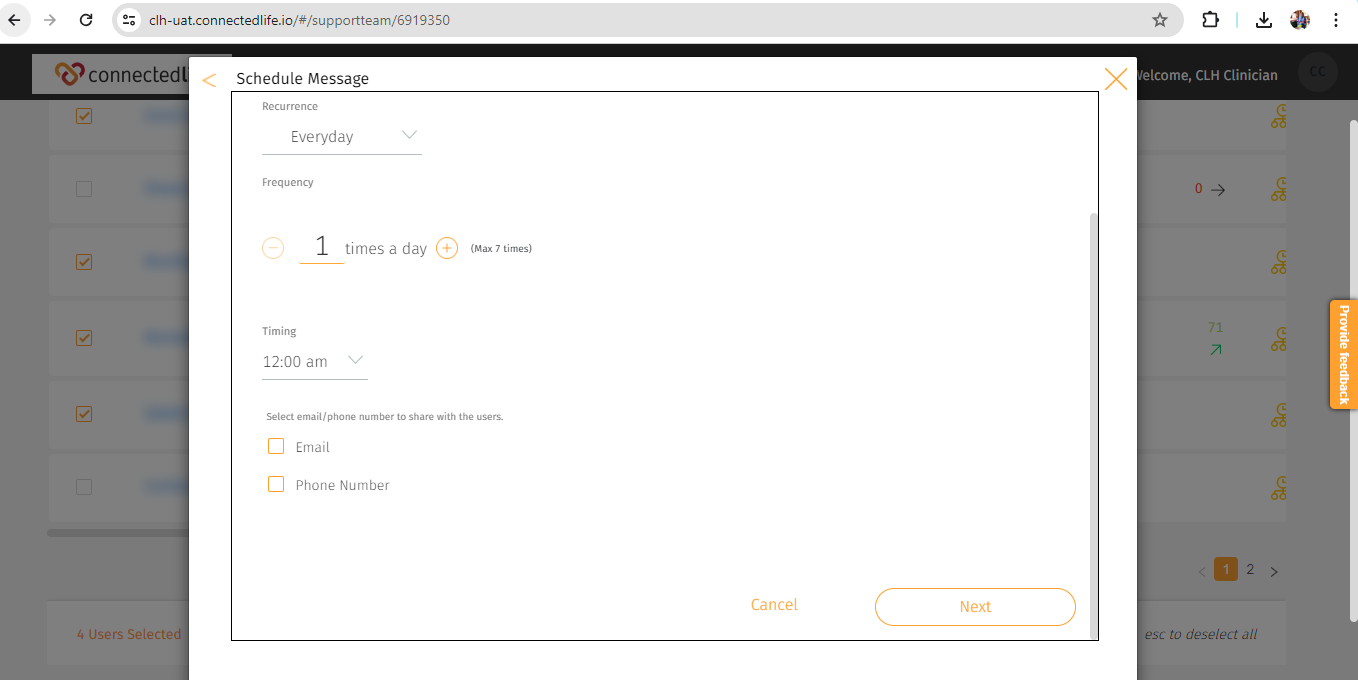
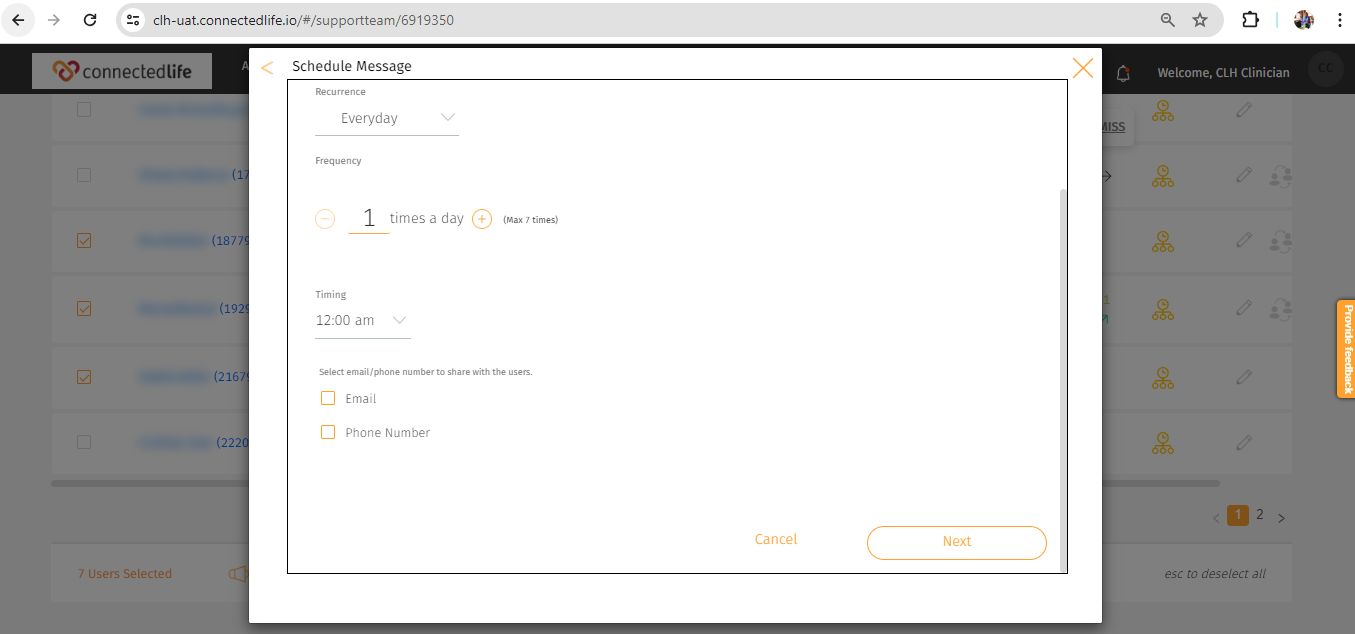
Step 3: Set the Scheduling Timeline

Please set the scheduling timeline by following the below steps:

1. Set Start Date and End Date

2. Set Recurrence

3. Set how many times a day (maximum 7) the message will be sent to the user

4. Set Timing

5. Set if the user will receive the message via email/phone number, other than in-app message

6. Click “Next”

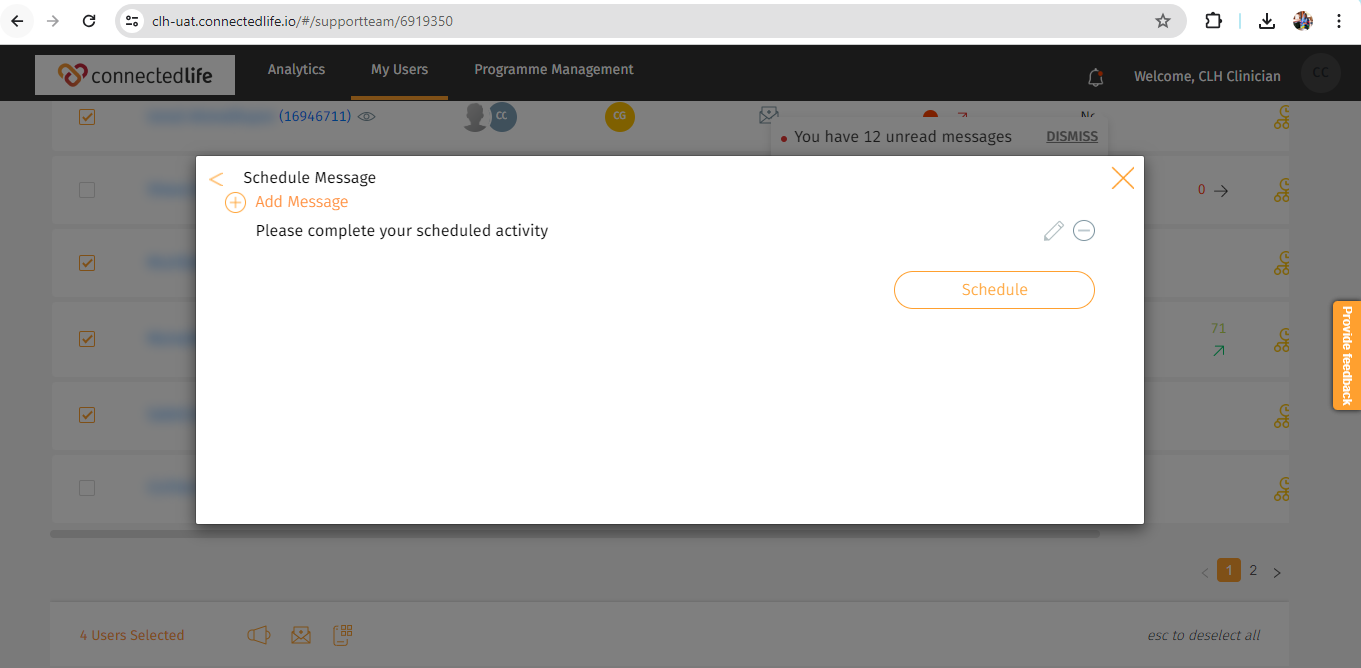
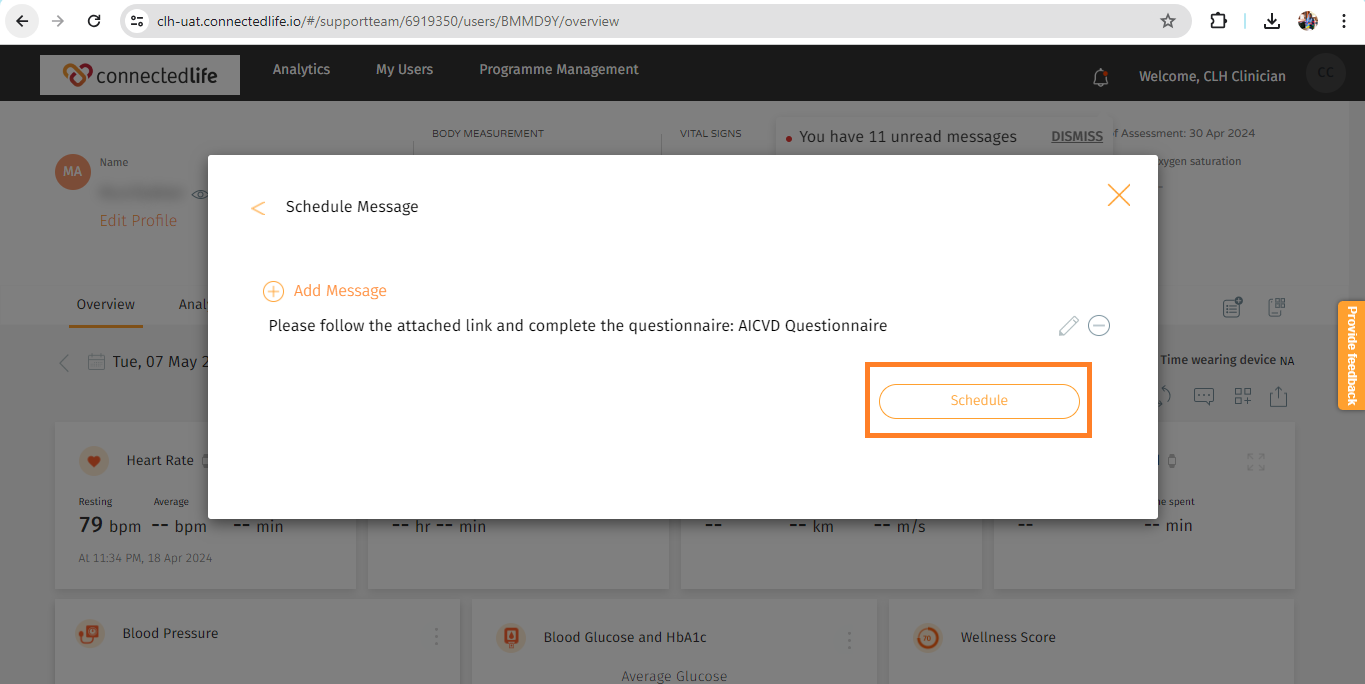
Step 4: Click “Schedule”

After setting the timeline click the “Schedule” option.

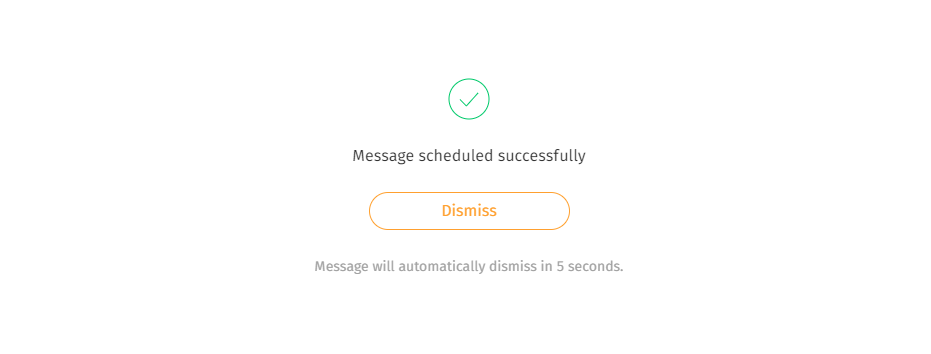
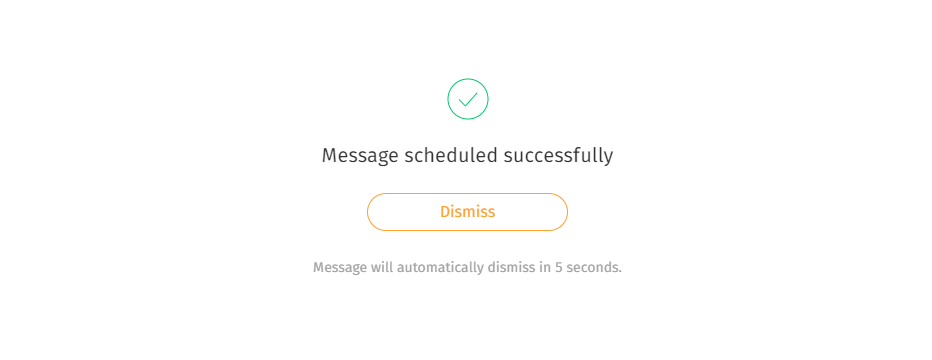
Step 5: Pop-up Message

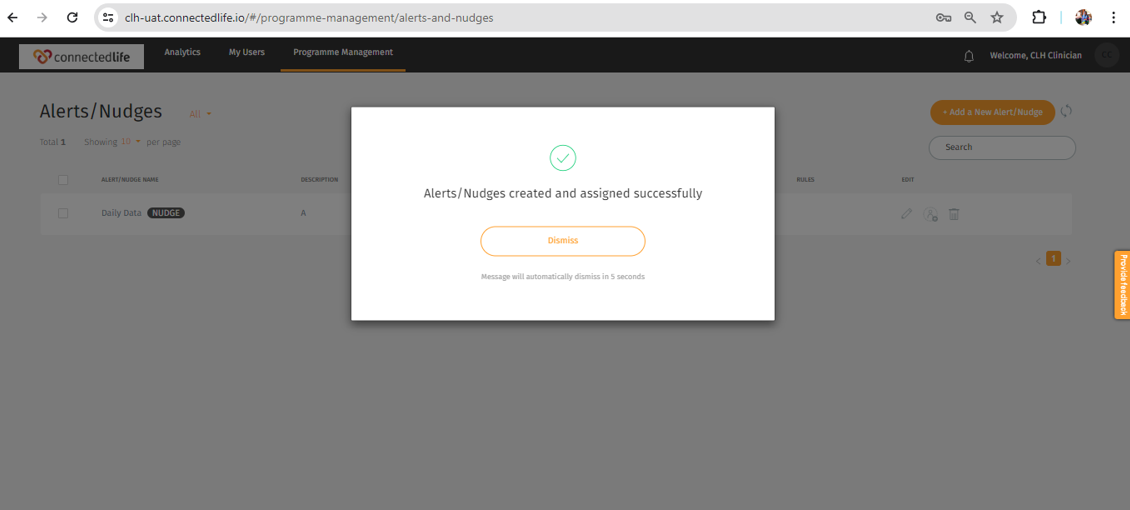
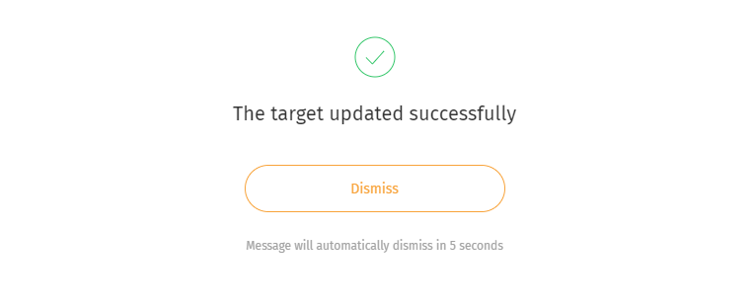
A pop-up notification will appear in the dashboard after successfully scheduling a message to the user.

Process 3: Send broadcast Message or Link to the Users

Broadcast Message:

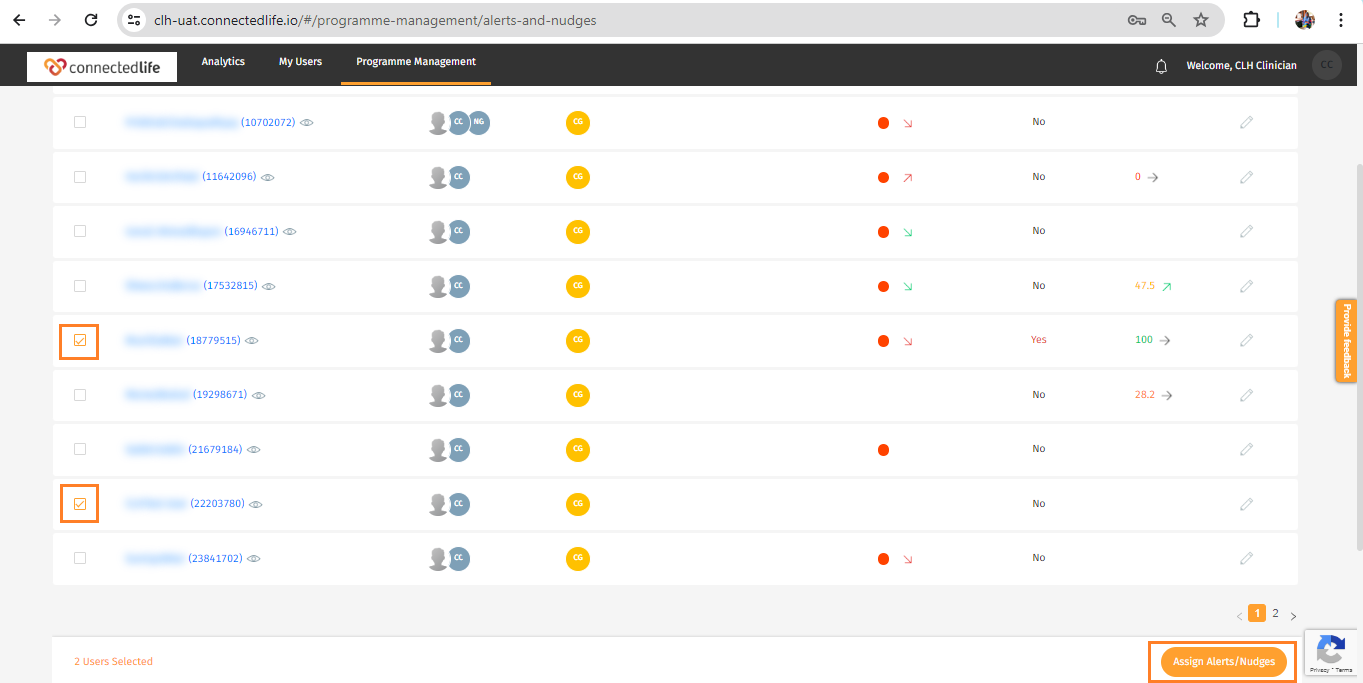
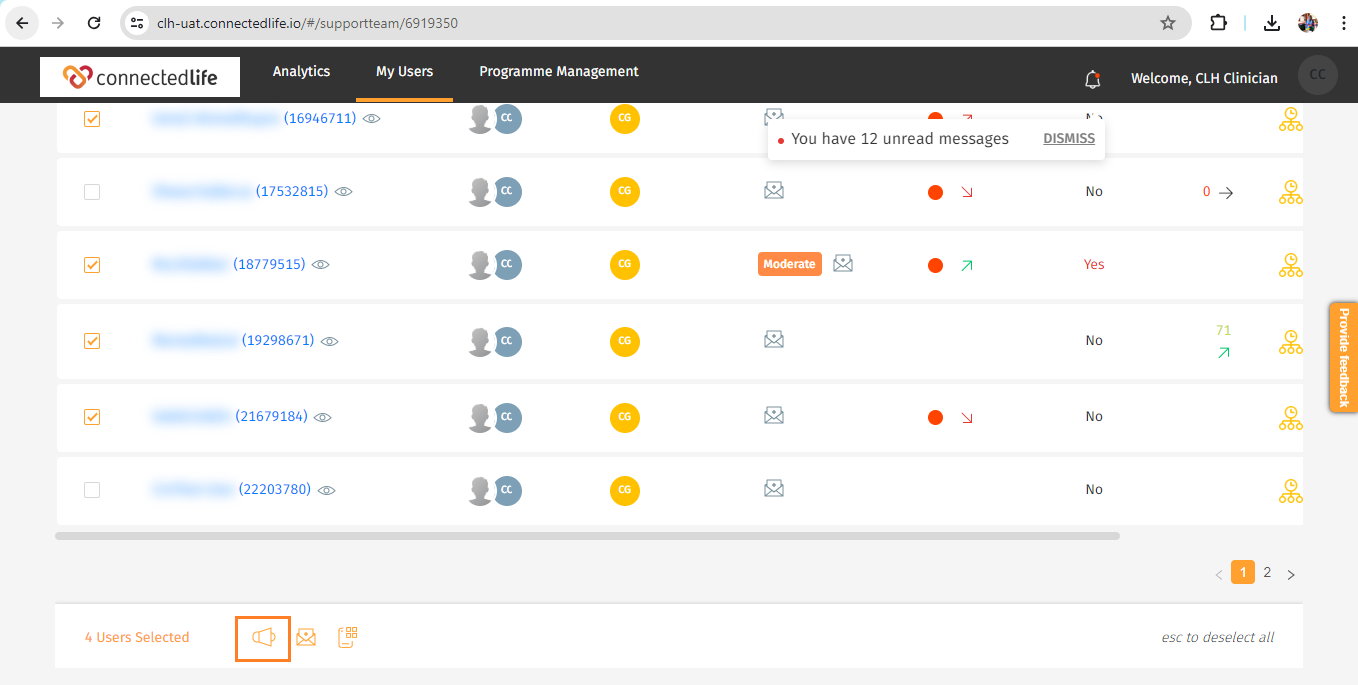
You can mark users under the “Assigned Users” list. On the left side of each user, there is a box. Click on the box and you’ll be able to mark the user accordingly to broadcast a message. Then from the bottom click the “Speaker” button.

Click the schedule icon at the bottom left.

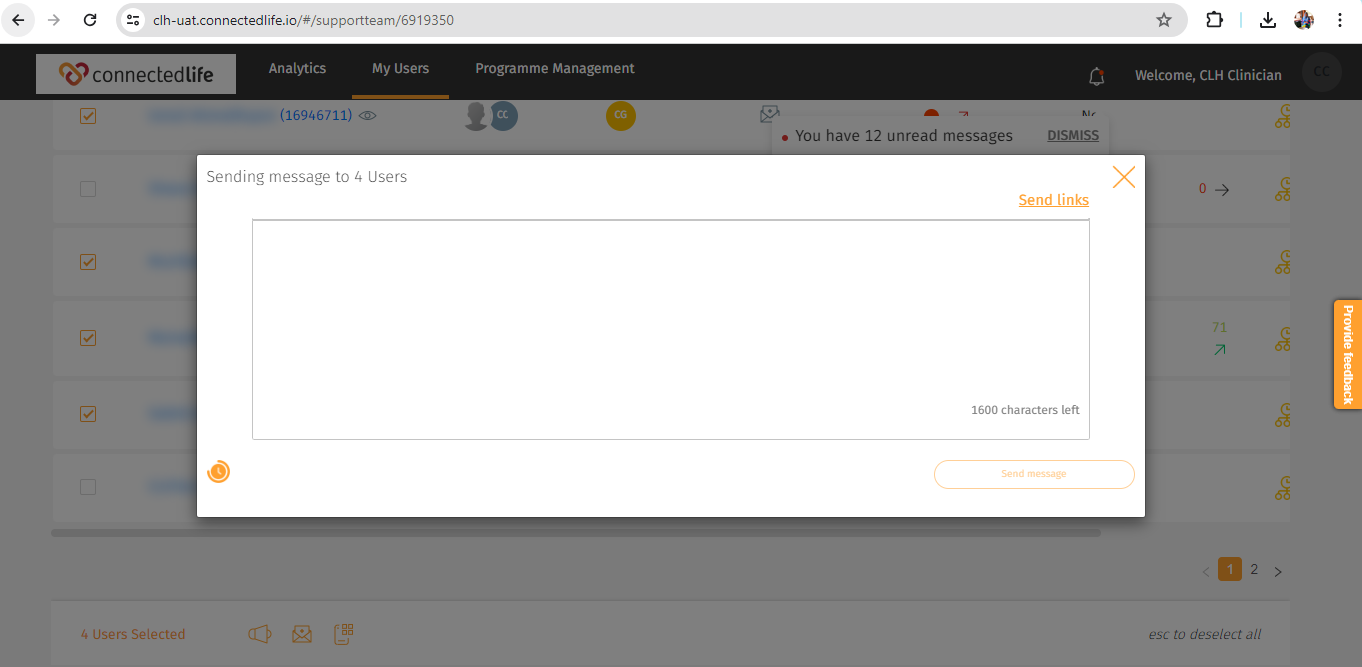
You can write the message on the box, then click Next.

Please set the scheduling timeline accordingly and click Next to proceed.

Click Schedule.

Broadcast Link:

You can broadcast links in the same way as messages. From the top right side “Send links” option, you can do that.

After clicking Send links, click the schedule icon at the bottom left.

You will see a list of links If they were set up before. Then select which one you want to schedule or you can add a new one by using Create Schedule Message.

Please set the scheduling timeline accordingly and click Next to proceed.

Once you Schedule successfully, a pop-up notification will appear that the Message scheduled successfully to the users.

Broadcast messages can also be sent or scheduled by the Organisation administrator.

Process 4: Broadcast message in Groups

For sending broadcast messages to the users, please log in to your Support Team Member (W+) account.

Now click the My Users option from the dashboard and select the “Groups” option from the dropdown list

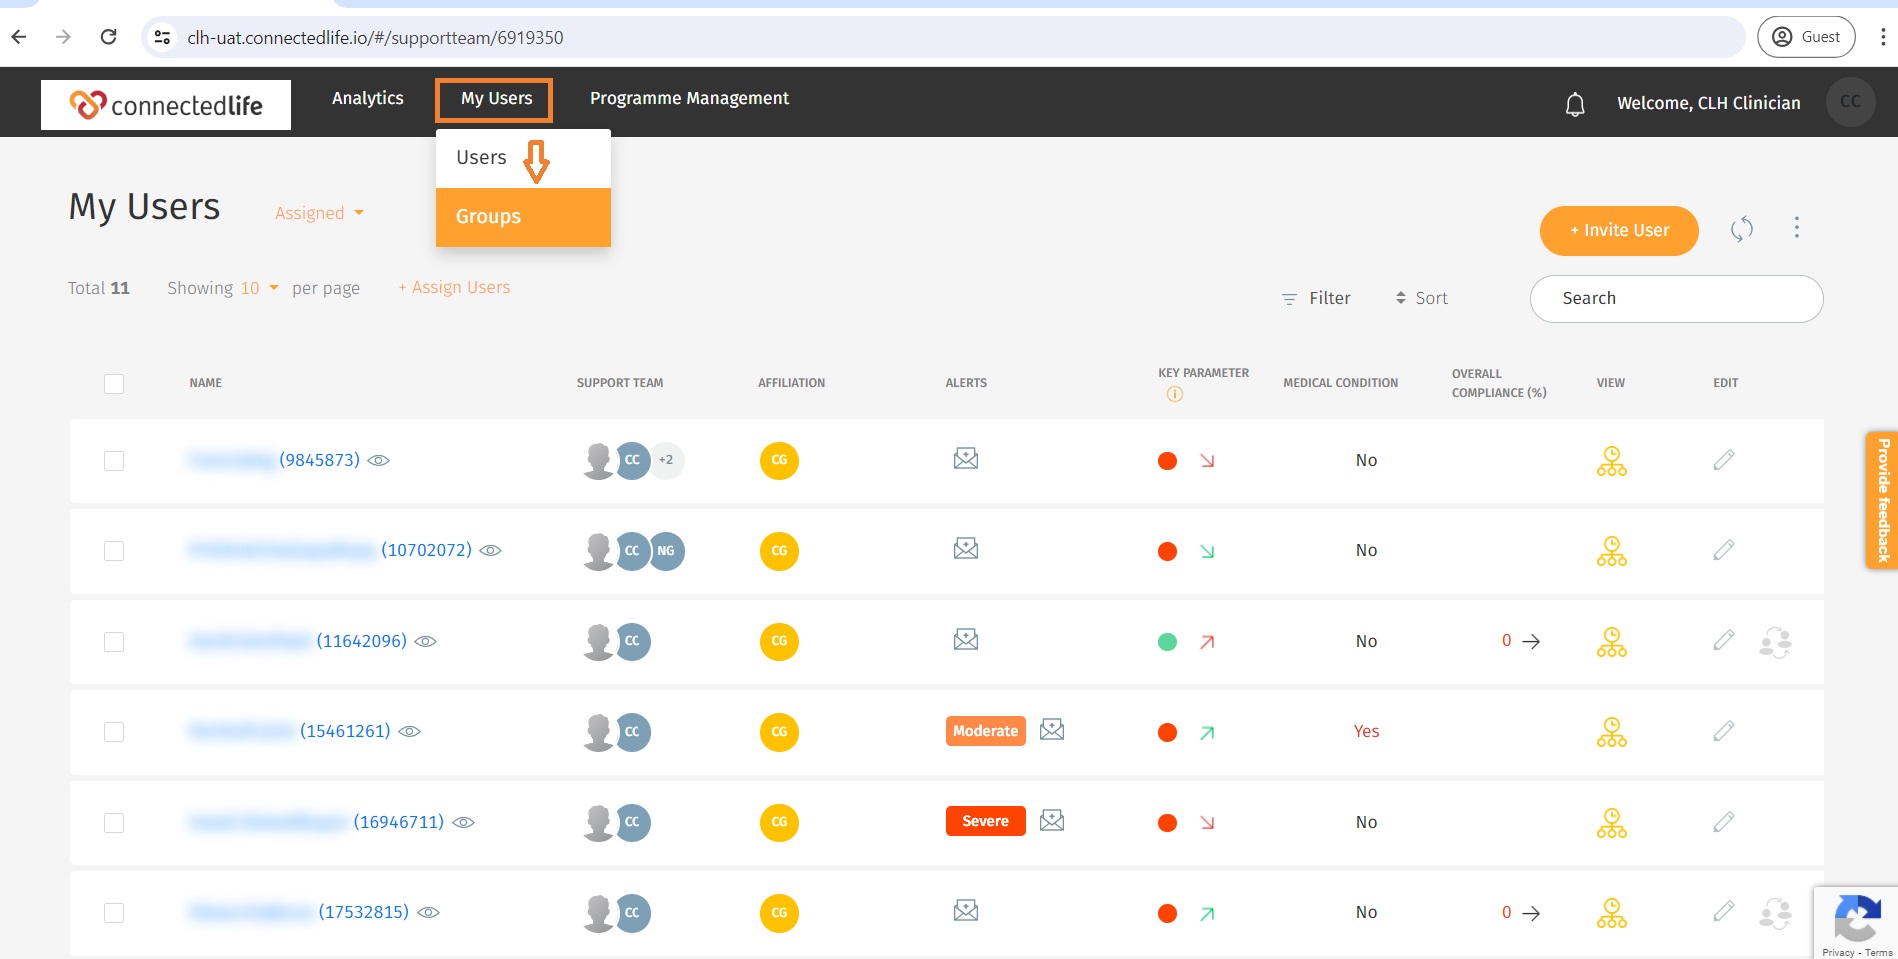
You will see the Group Management page. Search the Group name from the Search bar and Click on the Group visible on the left side of the dashboard.

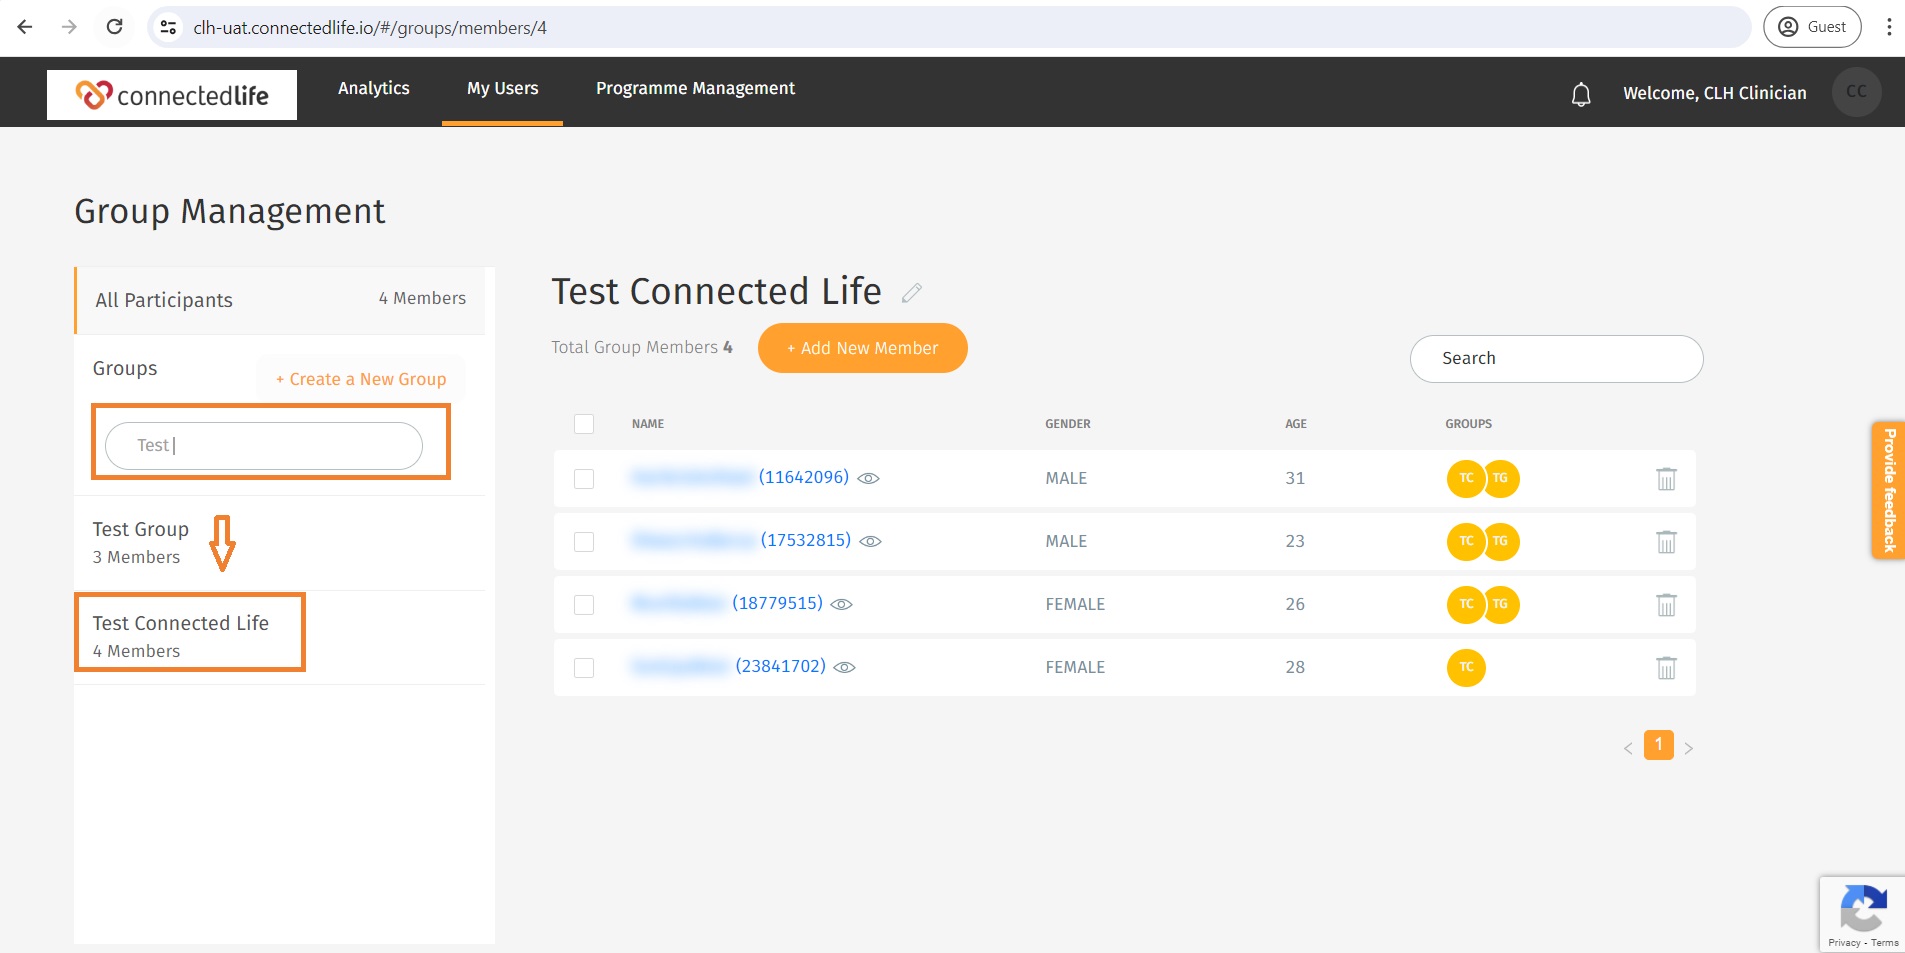
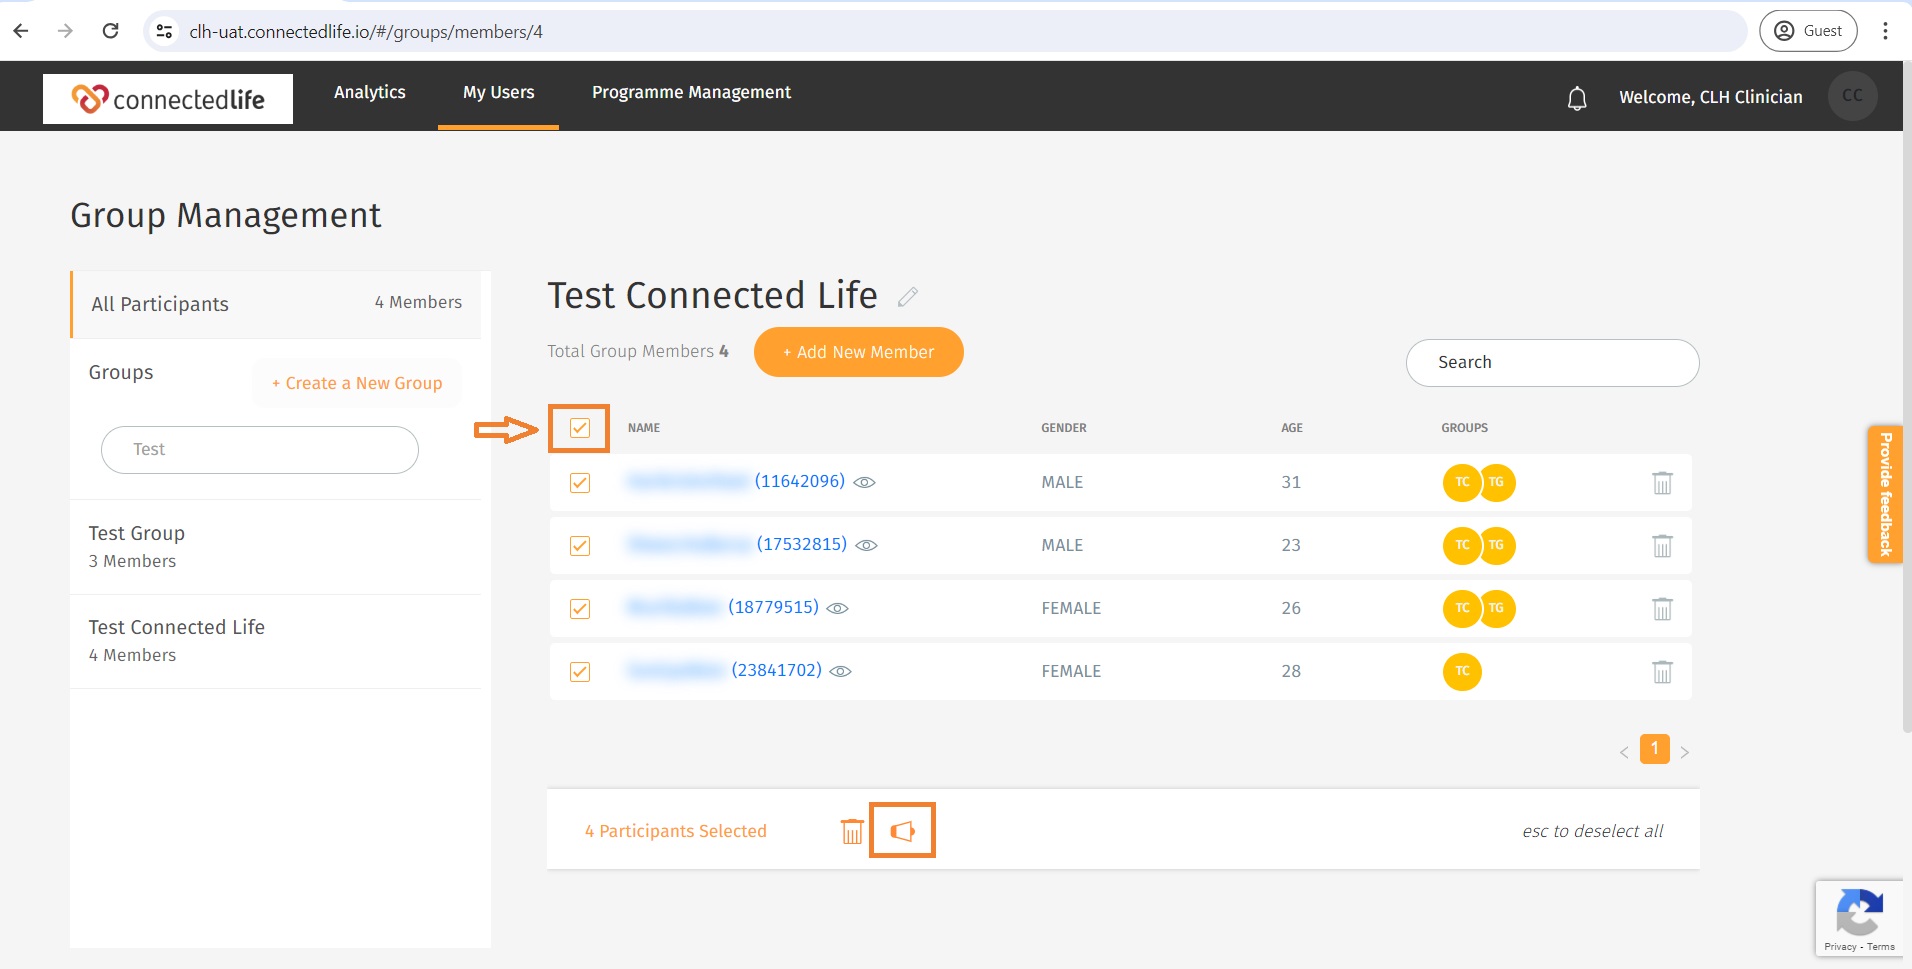
Now select group members from the box icon appearing on the left side of each user. Besides that, there is a box icon available beside the name column to select all the group members. Once you click on the box icon and select users, you will see the broadcast icon just beside the delete icon below the dashboard. Click on the broadcast icon.

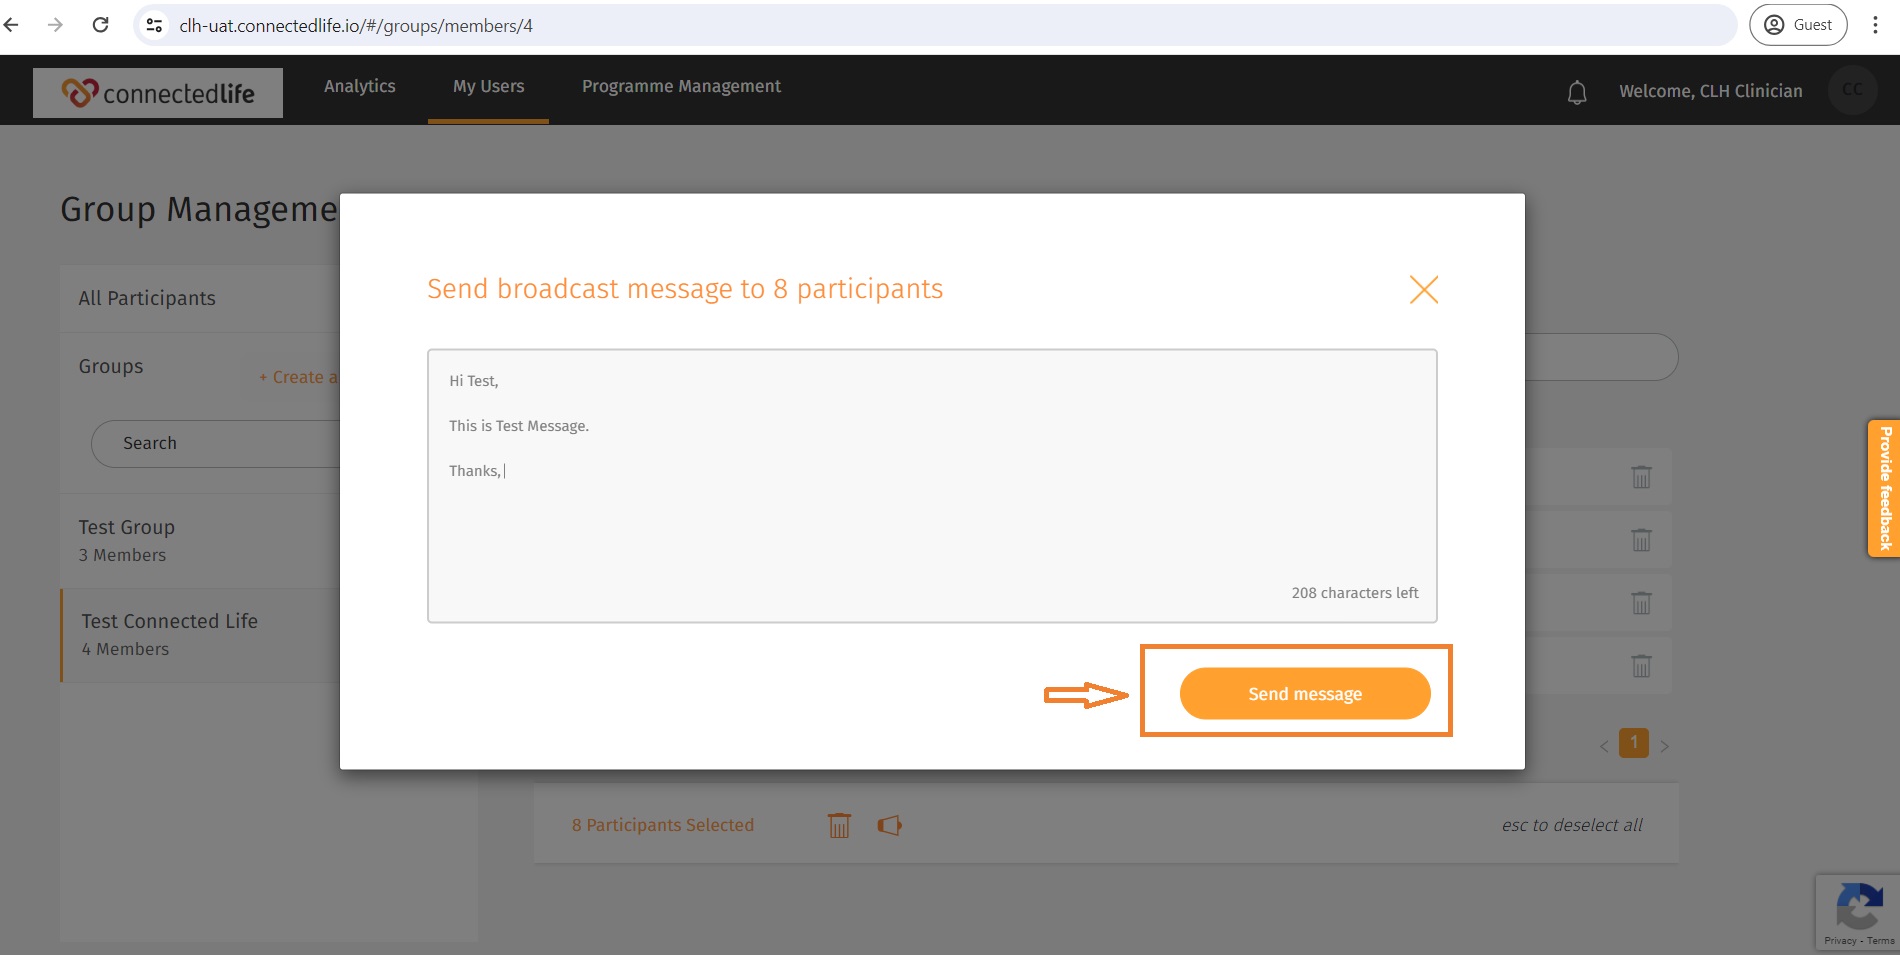
Type the message. Now click on the send message icon below. Now a pop-up will be displayed that the message was sent successfully to the participants.

Tips:

  • Support Team Member can only send messages but cannot view messages from the User. Messages sent from the user’s app will only be received by the Ulink account (24/7 monitoring team).
  • To send messages from the Organisation Admin account, simply log in and navigate to the Users tab. From there, select the individual or multiple users you wish to send the message to, and then click on the broadcast icon located at the bottom of the screen.

How to refresh a dashboard page and why it is important?

This article will help you to understand how to refresh the dashboard from your clinician account and why it’s important.

To utilise this feature you need to log in to your clinician dashboard. You also can do it from the administrative accounts dashboard like Org Admin, Department Admin, and Facility Admin.

Once you log in to the clinician dashboard, you will see a refresh button just beside the Invite User option in the top right corner of the dashboard. Click on the Refresh button and it will be refreshed accordingly.

You can refresh as much as you want. by just clicking on the refresh button. For administrative accounts (Org Admin, Department Admin, and Facility Admin, once you are logged in you will see a refresh button just top right corner of the dashboard. Click on it and the page will be refreshed accordingly.

The refresh button will help the dashboard to reload the data, which will help you to see the synced data properly. It’s also important to see the data with the most updated version.

How to check wearable device details in user dashboard?

This article outlines the process of check wearable device details in user dashboard.

Certain user data originates directly from the wearable device. Therefore, linking devices is essential for tracking user data, and knowing which devices are linked is also crucial.

  • Support team members can access wearable device details in the user dashboard by visiting the overview and analysis page of the dashboard.
  • The device details appear in the dashboard’s right corner after the device has been linked. Following clockface addition, the overview and analysis page displays clockface device data along with version.
  • Wearable device can check the Clockface version (e.g., V2.2.2, V1.0.1, or V1.2.0) alongside the battery level on the overview/analysis page on the dashboard from the user’s profile if the Clockface is successfully installed.


How to Set and Adjust Targets for wellness score?

The ConnectedLife platform allows the setting of targets personalised to the user/patient across a range of metrics. From process targets such as getting more exercise or reaching a daily step goal, or outcome goals such as achieving a healthier weight or constantly improved wellness score.

To set and adjust a users individual targets follow the step by step process below

Step 1: Navigate to Analysis

Navigate to the Analysis tab in the individual patients dashboard profile.

Step 2: Open the target parameters menu

Click on the edit button at the bottom right of the Wellness widget.

Step 3: Navigate target parameters

In this menu you will see a range of parameters that can be edited via individual drop downs. You can edit multiple targets at once but make sure to click save before closing the menu to ensure these new targets take effect.

Step 4: Save new parameters

Once saved, the patient will receive a notification of these changes and their profile will dynamically change to adjust to these new target values.