How to schedule Alerts in Programme Management?

If you need to assign Alerts to a user’s profile, a Support Team Member can perform this task.

Alerts serve as calendar reminders or notifications of new messages, aiming to keep users informed about their progress. This guide delineates the sequential process for scheduling Alerts through the ConnectedLife platform.

To initiate the schedule of a new Alert, follow these steps:
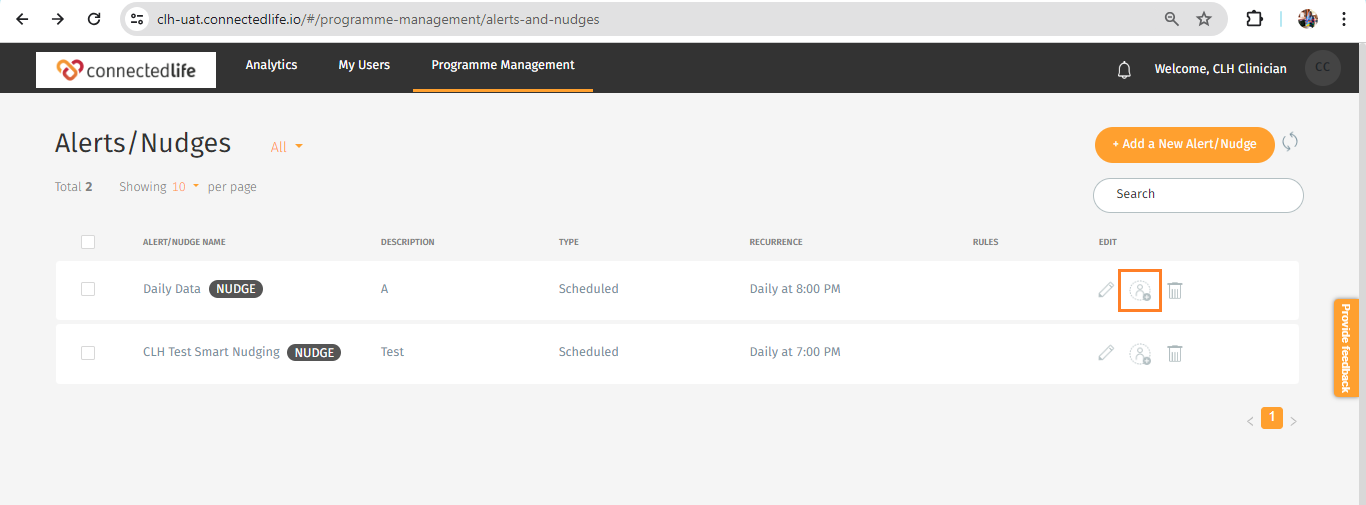
Step 1:

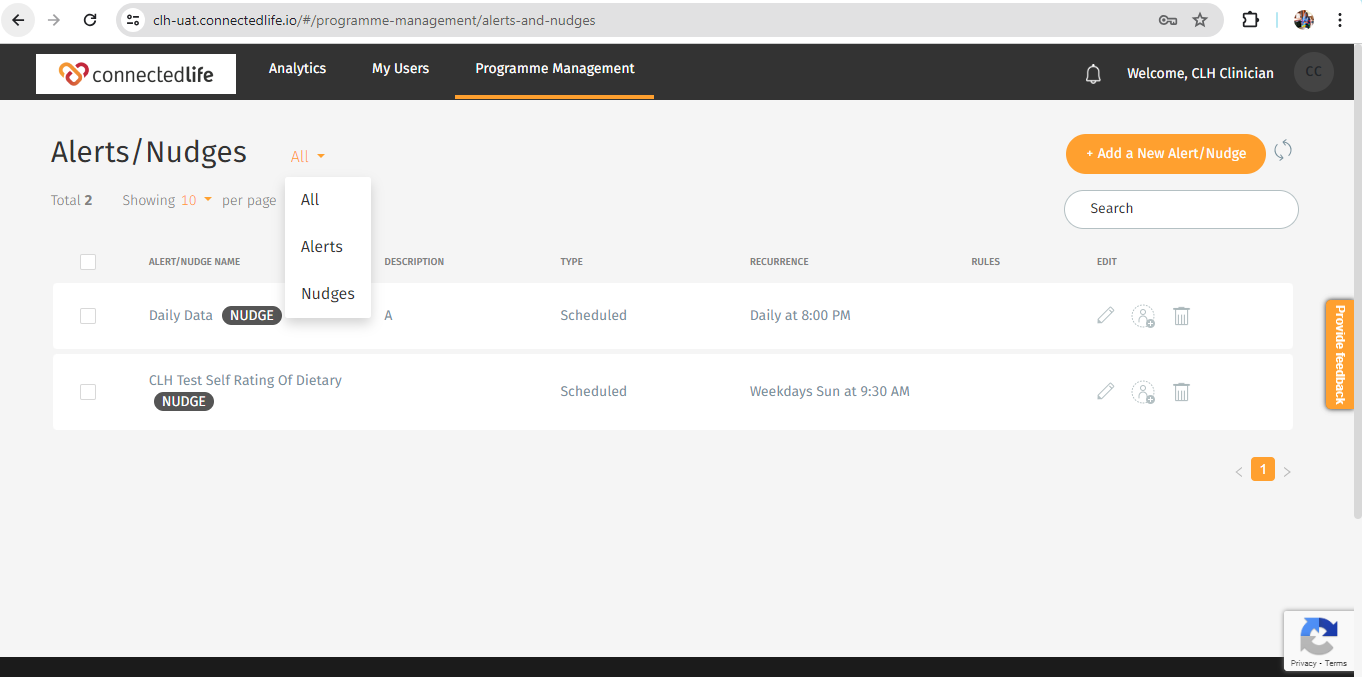
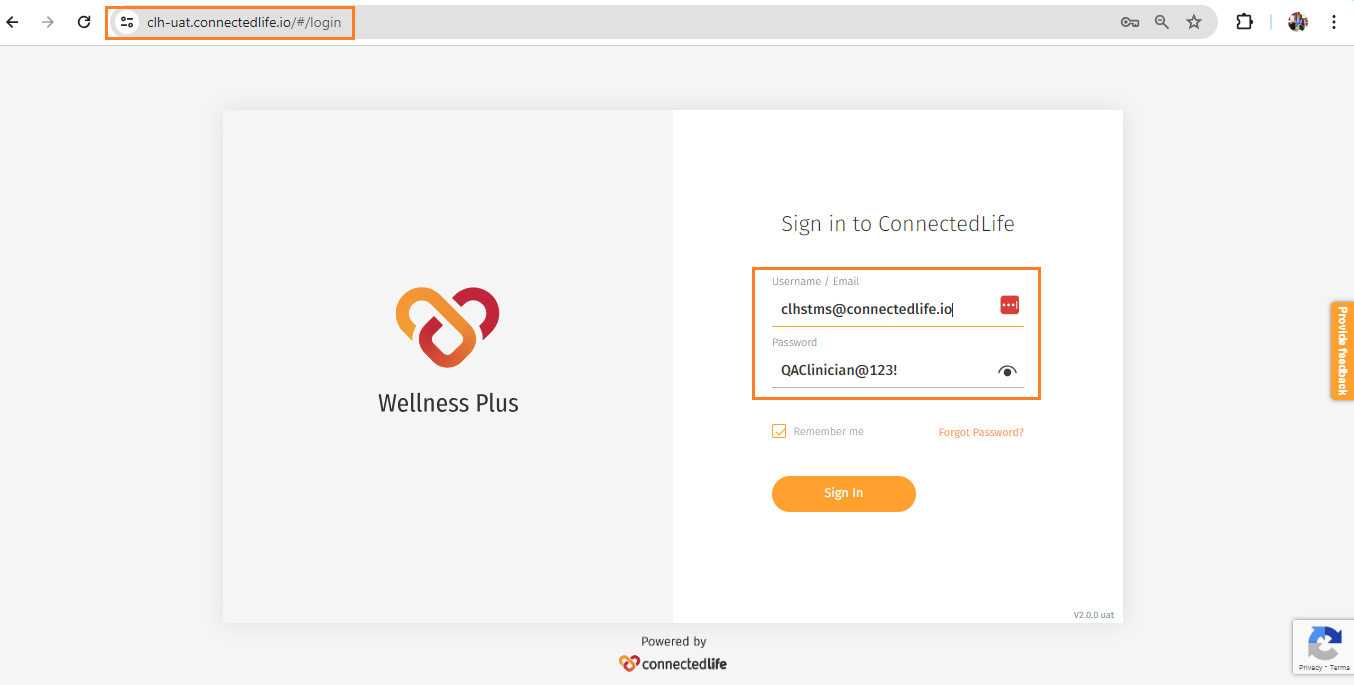
Begin by logging in with your valid credentials associated with your ConnectedLife account. Then, navigate to Alerts/Nudges under Programme Management. Click Alerts from the drop down option.
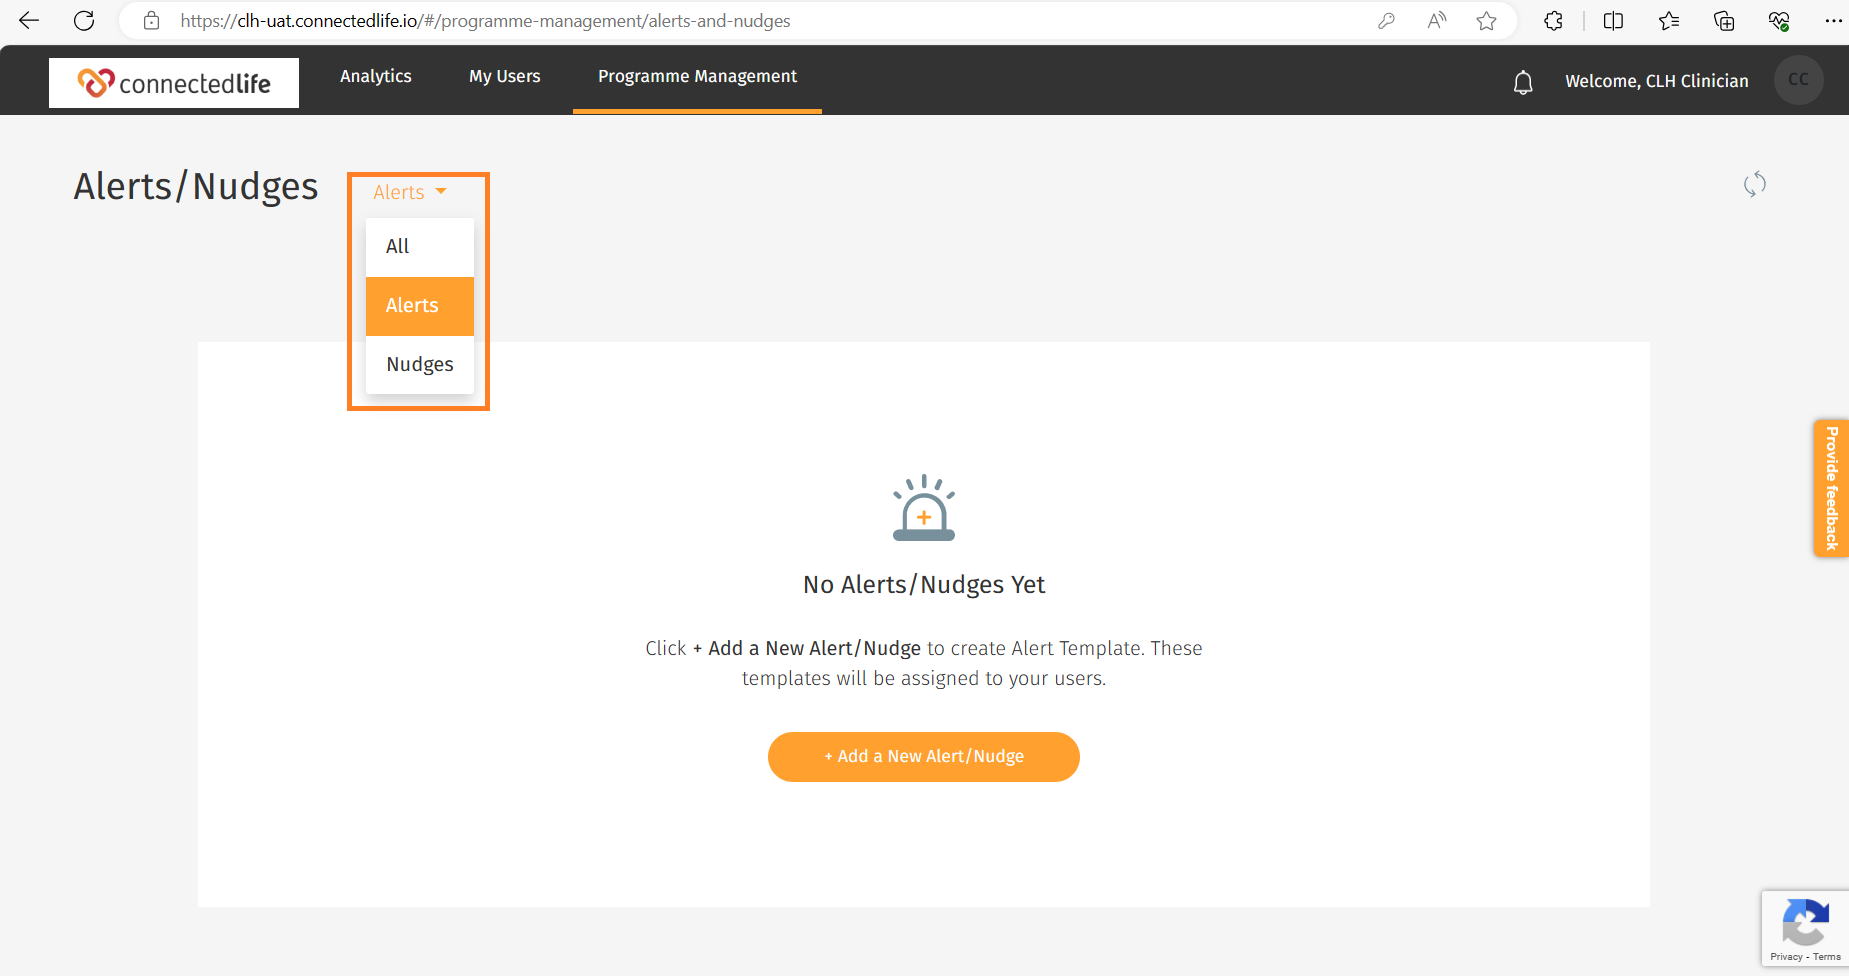
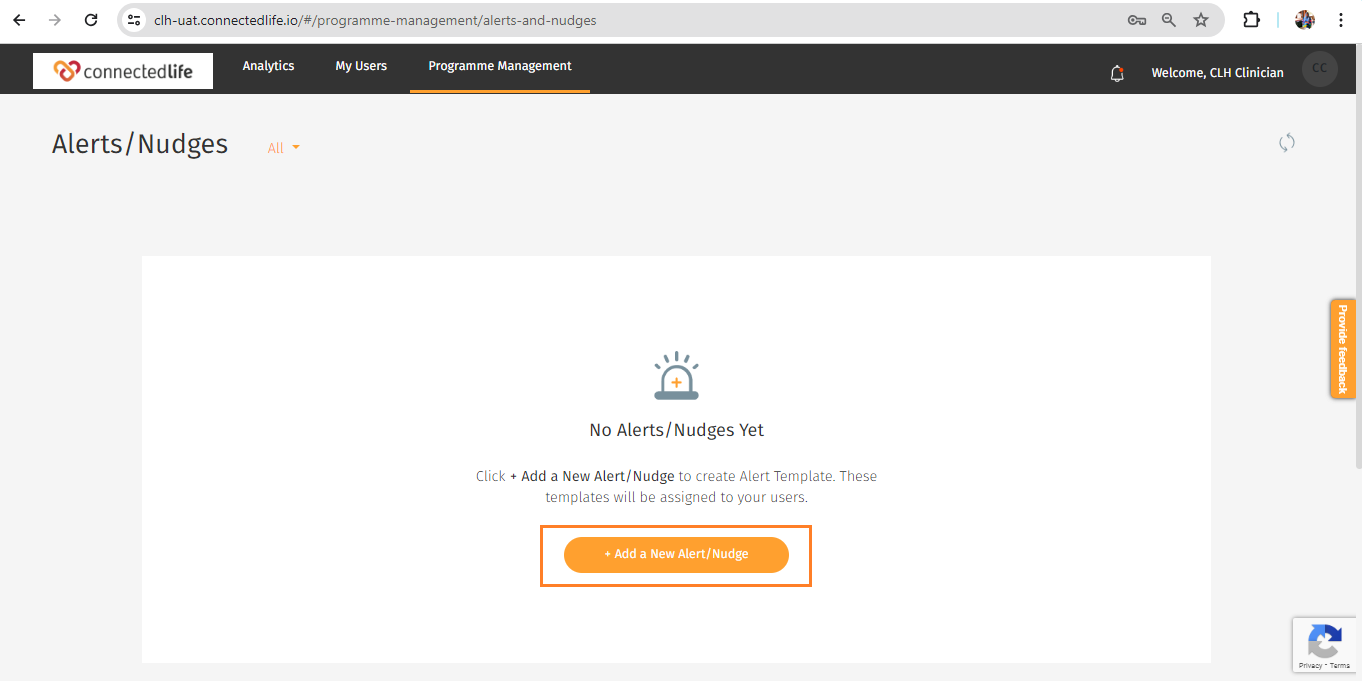
Step 2:

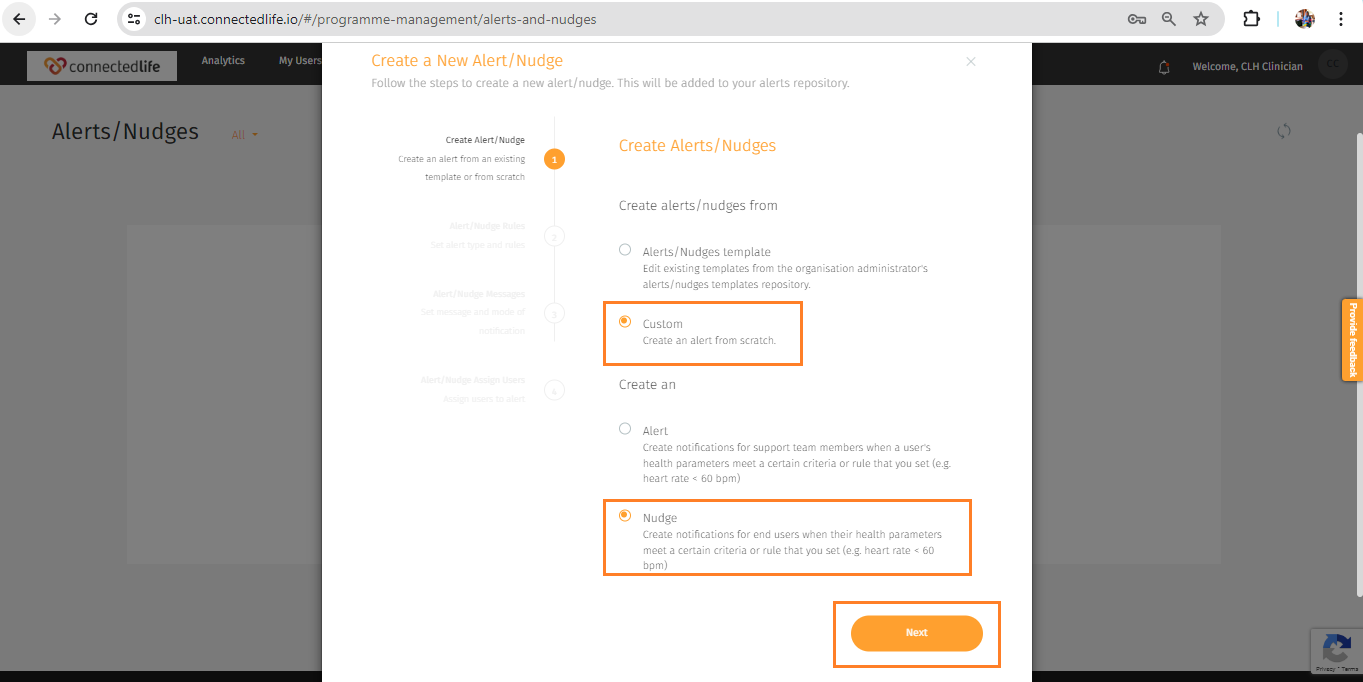
Next, click on +Add a New Alert/Nudge, which will redirect you to the page for creating a new Alert/Nudge. Here, you’ll encounter two options: Alerts/Nudges Template and Custom. Choose the one that suits your needs and proceed to the next step.
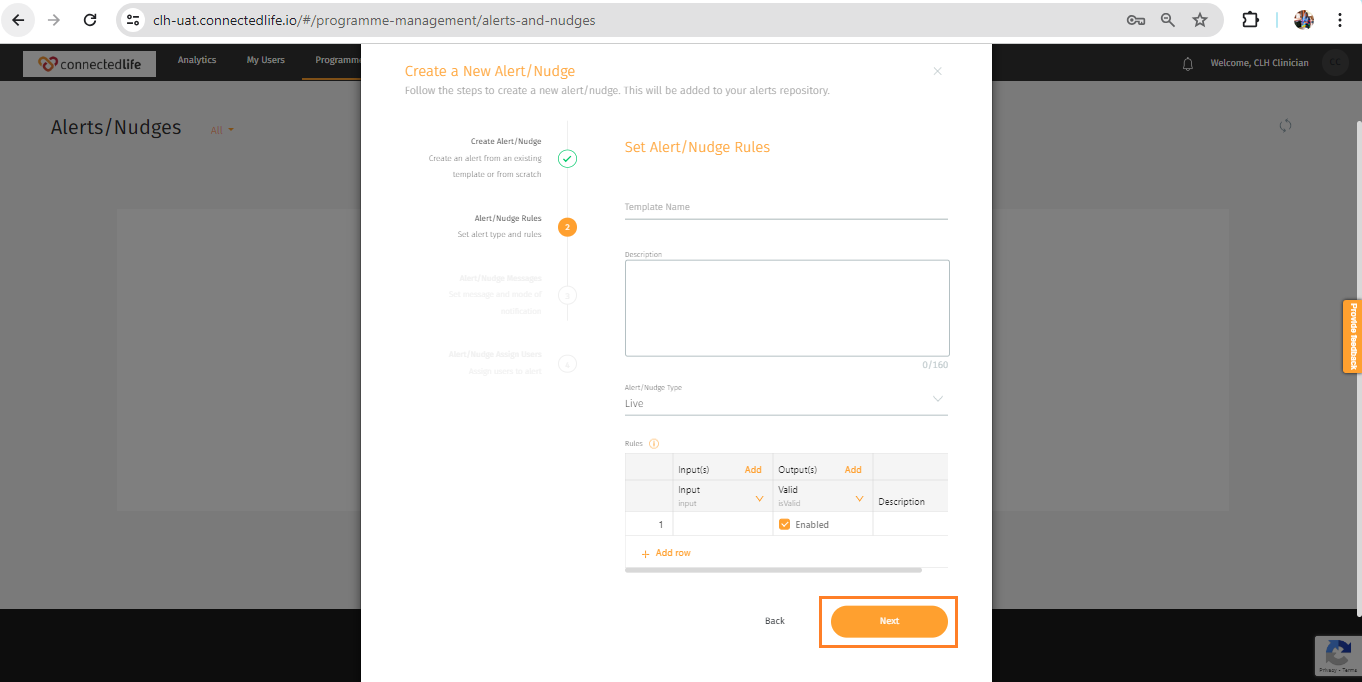
Step 3:

Here, You will be redirected to Set Alert/Nudge Rules page, complete all the mandatory fields. Additionally, ensure that you select the Alerts type as Scheduled.
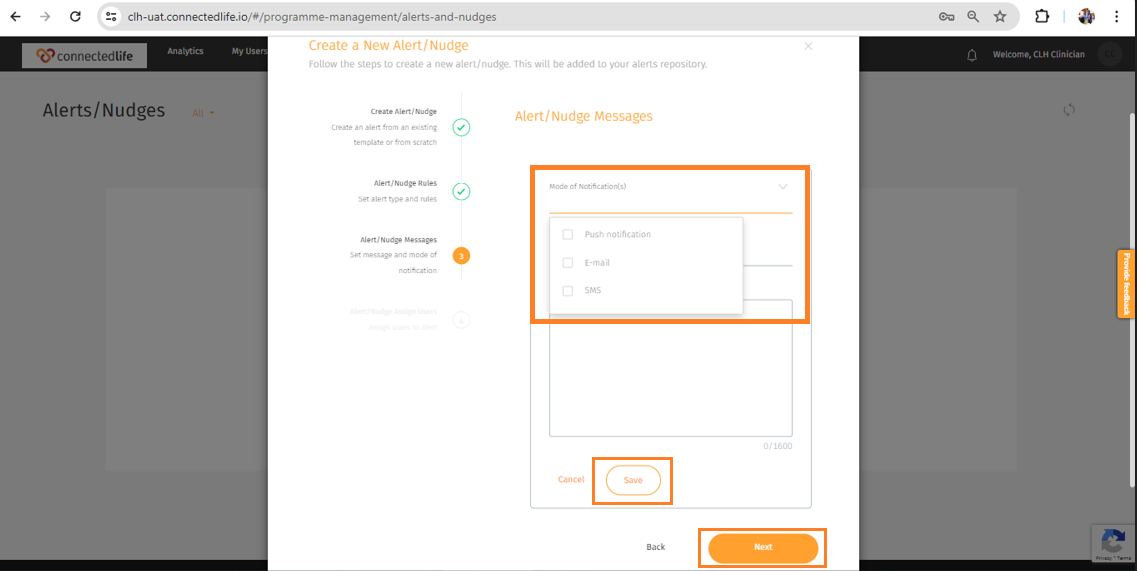
Step 4:

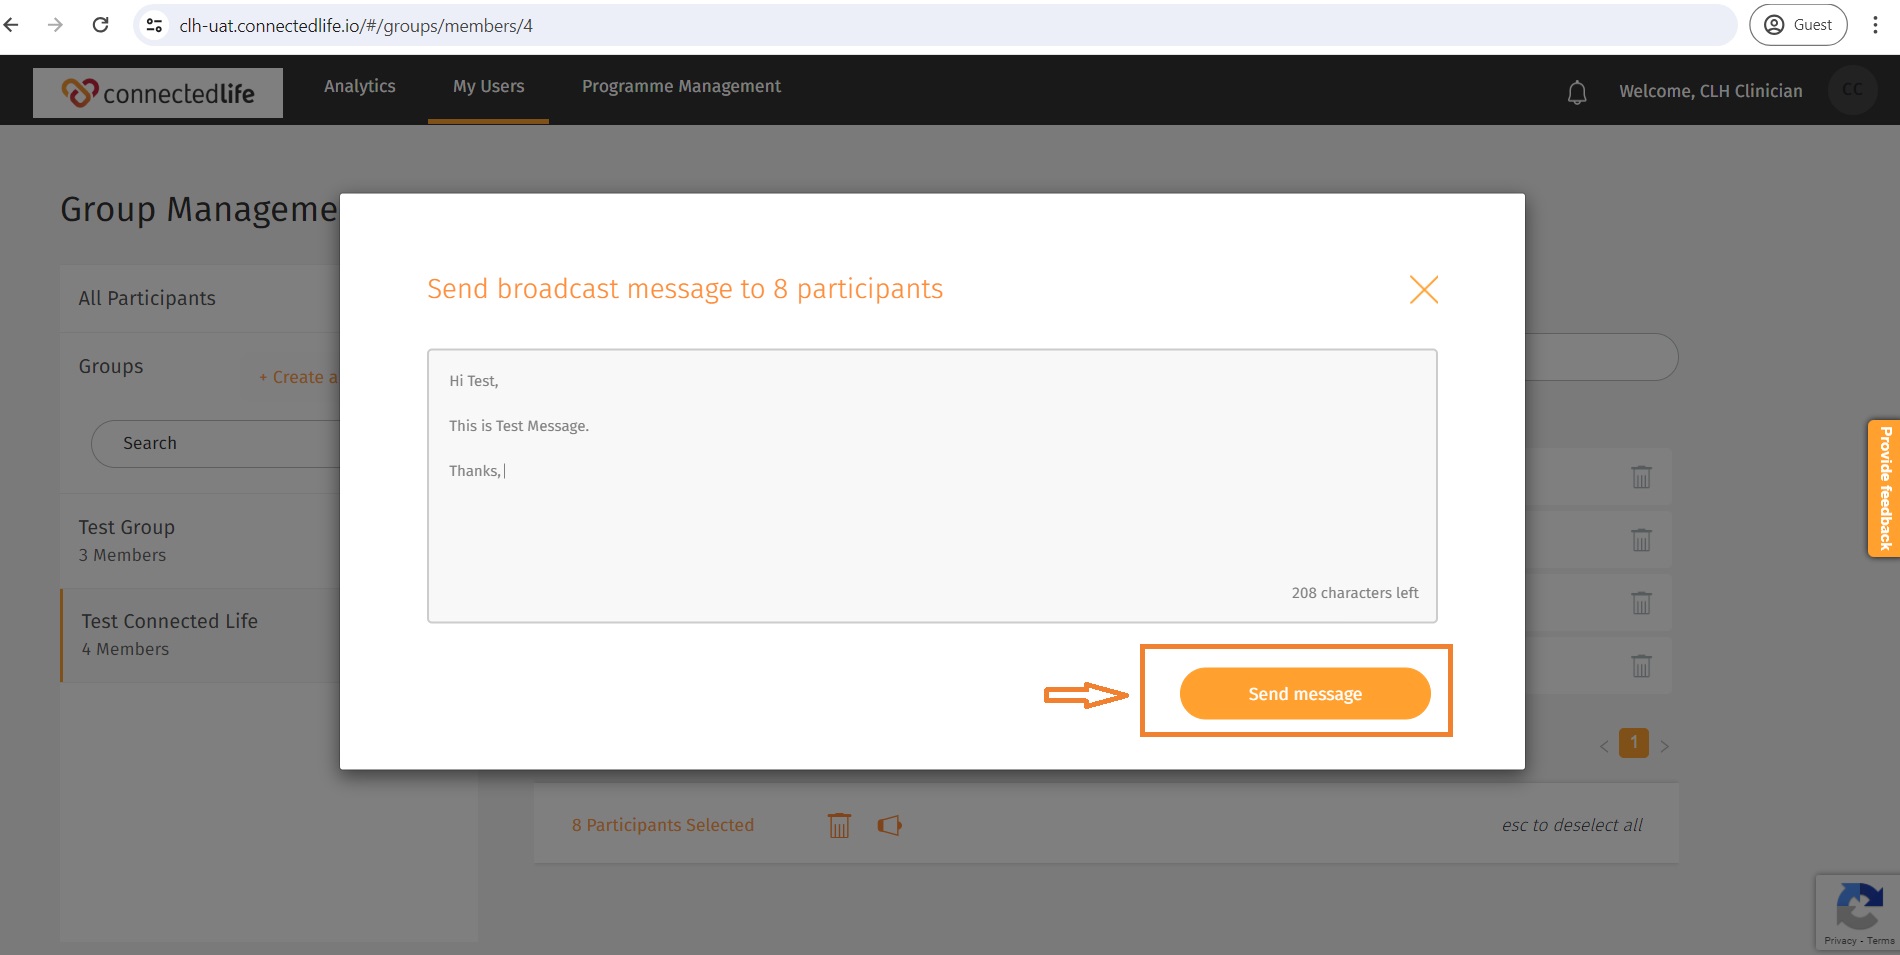
Now, choose the mode of notification (SMS, E-mail, or Dashboard notification), craft the message, and proceed to the next step. You’ll then be redirected to assign the Alerts to Users.
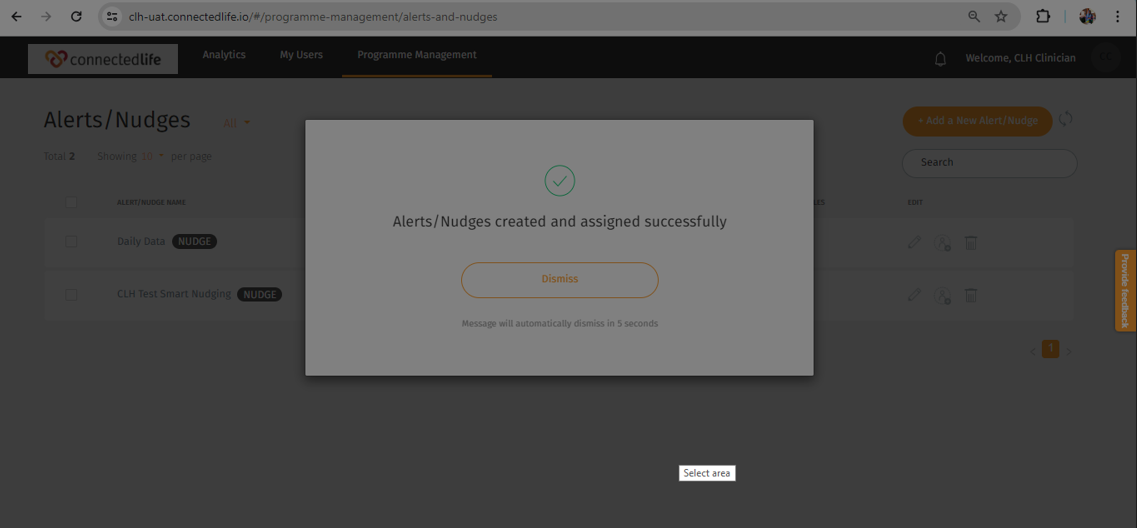
Step 5:

Select the users to whom you wish to assign the Alerts/Nudges, and click on Assign Alerts/Nudges. A confirmation pop-up will appear to confirm your action.

Note:

Please note that the specified nudge time will be received by the user according to their local time zone.


How to broadcast messages in Groups?

You can send broadcast messages in Groups from your Support Team Member (W+) account to the users. Support Team Member (W+) is also known as STM.

For sending broadcast messages to the users, please log in to your Support Team Member (W+) account.

Now click the My Users option from the dashboard and select the “Groups” option from the dropdown list.

You will see the Group Management page. Search the Group name from the Search bar and Click on the Group visible on the left side of the dashboard.

Now select group members from the box icon appearing on the left side of each user. Besides that, there is a box icon available beside the name column to select all the group members. Once you click on the box icon and select users, you will see the broadcast icon just beside the delete icon below the dashboard. Click on the broadcast icon.

Type the message. Now click on the send message icon below. Now a pop-up will be displayed that the message was sent successfully to the participants.

How to schedule Alerts/Nudges in Programme Management?

Alerts/nudges are some kind of notification or reminder that users get based on a certain condition. Alerts can be sent from support team members and nudges are for the user.

This article outlines the step-by-step process for scheduling Alerts and Nudges to the user in the ConnectedLife platform. There are two processes in which you can schedule Alerts and Nudges to the users. These are-

  • Scheduling from a single user profile.
  • Scheduling from programme management.

Step 1: Go to Program Management and Click Alerts/Nudges.

Click Add a New Alert/Nudge.

Also you can choose Alerts/Nudges which one you want to set from the dropdown menu.

Step 2: Search and select the Alerts and Nudge you want to set or search the existing Alert and Nudges Template from the search bar.

if you want you can set a custom nudge also from the “Custom” option and click Next.

Step 3: Crosscheck the nudge rule, schedule time, and click Next.

Step 4: Edit the communication channel (Email, Push notification and SMS) and messages then click “Next” or you can keep three channels as well.

Step 5: Assign Users to Nudges by clicking the box before the user name and Click “Assign Alert/Nudges.”

Now you will see your users list, where you can choose how many users you want to assign nudges. You can choose multiple users or single users as well. By the left side of each patient, there is a box will be shown and once you click the box the patient will be selected to assign nudges.

Step 6: Pop-Up Notification

Once you set the nudges successfully a pop-up will appear that says “Alert/Nudges created and assigned successfully”.

Step 7: Right beside the Edit icon you may see to whom users’ alerts/nudges are assigned.

Tips:

Please be aware that the nudge time you specify will be received by the user according to their local time zone.


How to Add/Delete Member(s) in Groups?

You can Add, Edit, and Delete members in Groups from your Primary Support Team Member (W+0 account. Support Team Member (W+) is also known as STM.

To do this log in to the STM dashboard → Click “My Users” → Select “Groups” from the drop-down → Group Management page will appear

From Group Management, search the group name from the search bar or you can click on the group you want to add, edit, or delete members.

Click the “Add New Member” option.

Now you will see the existing group members, also it will be visible the members you can add. Just click and add the members by clicking the box icon beside the users. But before adding members make sure you are the primary support team member of the users, otherwise, users won’t appear to add. You can remove any existing members from the group by deselecting members from the box icon.

You can also delete group members from the group management page. For deleting group members Just click on the delete icon beside each user. Or you can delete multiple members from there.

From the Group Management, You can change the group name and delete the group also. Just click on the edit icon beside the group name.

How to Create a New Group?

You can create a new group using a Support Team Member (W+) account from the Group Management Page. Support Team Member (W+) is also known as STM.

For your information, to add new members to the groups, you must need to be the Primary Support Team Member (W+) of these particular users. If you are a secondary STM, you won’t be able to add users to the group.

To create a group, Please log in to your Support Team Member (W+) account first.

Now click the My Users option from the dashboard and select the “Groups” option from the dropdown list.

Group Management Page will be displayed. Select the “Create a New Group” option from the Group Management Page.

Now Input the Group Name in the group name field and click the “Create Group” option and the group will be created accordingly.

What is Group Management in Group?

Group Management Page will help you to manage your groups more effectively. You can see the Group Management Page from your Support Team Member(W+) account. Support Team Member (W+) is also known as STM.

To access to Group Management page

Login to the support team member account → Input PIN → My users → Groups → Now Group Management page will appear.

Here are the key features you can utilize using Group Management in a group.

  • Create a New Group: You can create a new group from the group management page.
  • Edit Group: From the edit option on the right side of the group name you can change the group name. Moreover, you can delete the group name also if required.
  • Add New Member: Using this option from the Group Management Page you can add new group members or you can remove group members as well.
  • Delete Group Member: You can delete group members from the Group Management Page. Delete Icon is available on the right side of the user name on the Group management page.
  • Send Broadcast messages to the group members: You can send Broadcast messages to the group members by selecting multiple users. Once you select group members from the Group Management Page, you will be able to see the broadcast Icon below, Type the message and now you will be able to send broadcast messages to the group members. You can select broadcast messages by selecting the multiple members of different groups by selecting all participants from the Group Management page.

What is Groups?

This feature facilitates the management and analysis of various groups within the platform. Different organisational roles can view Group names, member statistics, and metrics related to Wellness Score and Engagement, enabling targeted interventions and support where needed.

Support Team member (W+) also known as can Create a New Group, Edit a Group, Add New Member, Delete Group Member, and Send Broadcast messages to the group members from the Group Management Page.

Why user’s latest data can’t be seen by Support Team Member (W+)?

Support Team Member’s (W+) major role is to oversee users/patients’ activities. Managing user lists, monitoring and analysing patient condition as well as monitoring patient health parameters and compliance etc are crucial for healthcare professionals.

The reasons why Support Team Member (W+) are unable to view the most recent patient data are discussed below.

Users, all data come to the database in two ways:

  1. Wearable Device
  2. App Profile Log

Users should keep in mind that they should wear their wearable devices regularly and properly. Log input properly from the user app so that the data flow remains good and healthcare professionals can get the latest data.

  • User wellness latest version apps need to be up to date to get the latest data from healthcare professionals.
  • However, sometimes device syncing time might take longer than it should be so healthcare professionals might not see the latest data.

  • On the right side of the healthcare dashboard, there is a refresh icon. Please click that button to refresh the dashboard and can get the latest data.

Tips:

  • User wellness score is heavy data to load and more than twenty parameters are included here. This will take time to load and show to healthcare professionals. So we suggest waiting patiently to get wellness score data.
  • Just to make sure your health coach and users both have a very seamless internet connection.

User(s) Monitoring process

This article outlines the patient monitoring process for The Support Team Member (W+) in the ConnectedLife platform.

Login to the dashboard

Input your valid email address and password associated with your Support Team member (W+) account.

Monitoring Process 1: Viewing User’s Key Parameters

The Key Parameter column displays a summary of the user’s health condition and improvement. You can view the details of the user’s self-reported conditions by hovering your cursor over the dot.

Monitoring Process 2: Viewing User’s Compliance Percentage

The Overall Compliance column displays a summary of the user’s daily schedule adherence. You can view the detailed schedule of the user by hovering your cursor over the dot.

Monitoring Process 3: Viewing User’s Alerts

You can get the user’s Alerts under the “Alerts” option. The severity label depends on the User’s data such as PMCC, SpO2, body temperature, blood pressure, resting heart rate, and respiratory rate. The severity displayed for each User is the data with the highest alert.

Monitoring Process 4: Viewing User’s Last Sync

From here we can view the last sync data and time associated with the wearable device in the user’s profile.

Additional Features

From the upper right side of a user/patient’s profile in the dashboard, you can easily monitor the Time-wearing device percentage and the Device Brand, Model, and Battery Charge percentage.


How to Customise widgets for mobile in user dashboard?

This insightful article guides you through the ability to seamlessly personalise widgets and modify parameters within the Support Team Member dashboard, empowering you with a deeper understanding of customisation possibilities.

What is Widget?

Widgets are small, often interactive components or tools that display specific information or perform particular functions within a user interface.

Widgets Customisation: For One user

Step 1:

Access the dashboard using the credentials affiliated with it. Then go to the Users under My Users tab.

Enter the user profile by clicking on the user name or ID.

Or search the user name or ID in the search box.

Step 2:

You can Customise the Widgets from the main page that comes after logging in. Swiping right, you will see the Widget option.

Now tap on the Widgets option (marked in the picture) after entering your profile.

Step 3:

Transform your dashboard effortlessly by toggling widgets on or off with a simple click. Plus, from this page, you have the power to enable or disable items on the Analysis page as well.

Keep in mind that certain options may appear disabled or unclickable as they are currently scheduled for users. To customise them to your preferences, remove the active schedule first, then unlock their full customisation potential.

Step 4:

Upon finalizing your decision, keep it by clicking the “Save”.

Step 5:

A successful pop-up will appear after saving it.

Widgets Customisation: For Multiple User

Step 1:

Access the dashboard using the credentials affiliated with it.

You can customise the widgets for multiple users at the same time, But you have to be the primary support team member of your assigned users. If you want to Customise the widgets for all of the assigned users, you need to click on the top left of the dashboard just beside the name section you will see the box, Just click the box and all users will be selected accordingly.

Or If you want to Customise the widgets for some of the users just click on the left side of the user name and user ID, and you will see the box, click on the box and users will be selected accordingly.

Once you are done just click on the “Widget” icon from the below.

Step 3:

Now you can Customise the widgets for the Home and Analysis section, just click on the box, on the left side of the widget’s name as per your requirement, Once done click on the “save” Icon.

Step 4:

A successful pop-up will appear after saving it.

Tips:

Widget customisation can be done only by Primary Support Team Member.